Maskrom Mode
Maskrom is a special internal firmware of RK3399 that runs Rockusb driver automatically when there is no bootable firmware found on on-board storage such as SPI flash, eMMC or microSD card.
Maskrom mode can be your last resort if all other install approaches are not working for you.
On Helios64, there are two ways to force the maskrom mode:
-
Disable SPI flash and eMMC according to Boot Mode Jumper and remove microSD card.
-
Using Recovery Button.
Rockusb is a vendor specific USB class from Rockchip to download firmware. This USB device has Vendor ID 0x2207 and Product ID 0x330c.
Info
U-Boot has rockusb command, but it is not compatible with the Rockchip utilities
Prerequisites
RK3399 loader
In maskrom mode, SoC initiliazed without DRAM and storage support therefore it needs a loader to initialized DRAM and prepare the flashing environment.
Download the loader rk3399_loader_v1.24_RevNocRL.126.bin from here
Helios64 OS image
You will also need to download an OS image to write to the internal eMMC.
Go to Download and chose one of the latest build.
Important
- OMV (OpenMediaVault) is only supported on Debian OS.
- Armbian 20.08.8 and earlier version has bug that prevent system to boot from eMMC!
Windows
Info
Latest version of the tools can be downloaded from Rockchip GitHub.
Rockusb driver
Download and extract DriverAssistant_v4.91.zip from here.
Run DriverInstall.exe under the extracted folder and press Install Driver.
AndroidTools
Download and extract AndroidTool_Release_v2.71.zip from here.
Linux
Download prebuilt rkdevelop from Rockchip GitHub. Extract the downloaded rkbin-master.zip file.
Copy rk3399_loader_v1.24_RevNocRL.126.bin to rkbin-master folder.
Note
- Prebuilt binaries have been tested on Ubuntu 18.04 and 20.04
- You could also compile it from source by following instructions at Rockchip Wiki.
Write OS Image to eMMC
1) Make sure the system is powered off.
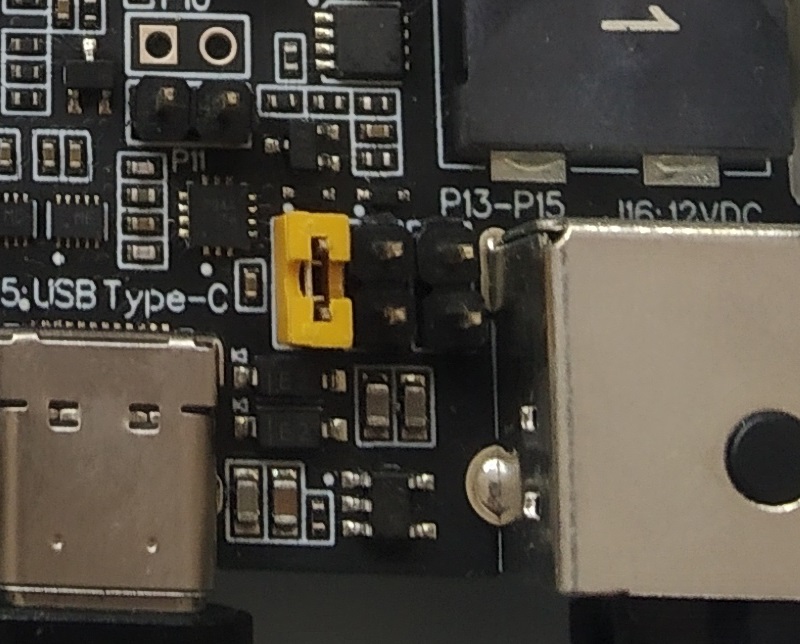
2) Put jumper cap to P13 to enable it.
3) Plug in USB type-C cable to Helios64 and the other side to PC.
4 a) Disable SPI flash and eMMC according to Boot Mode Jumper and remove microSD card. Power on the system.
or
4 b) Press and hold Recovery button. Power on the system and release recovery button after System Activity LED blink twice.
Under Windows
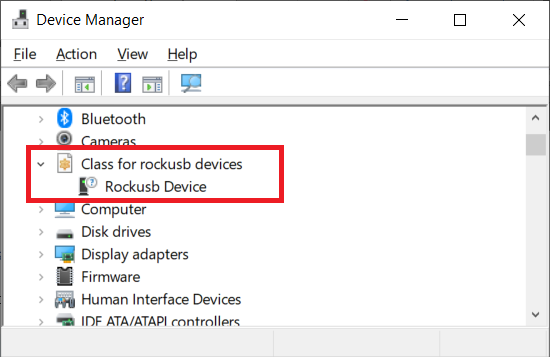
1. Open Device Manager and verify whether rockusb device is recognized.
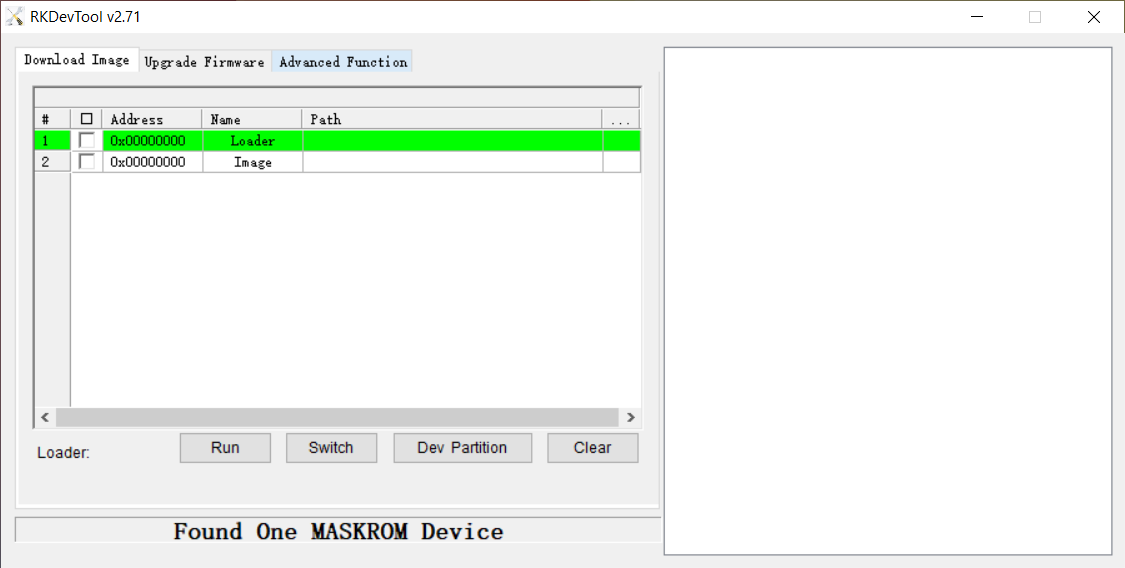
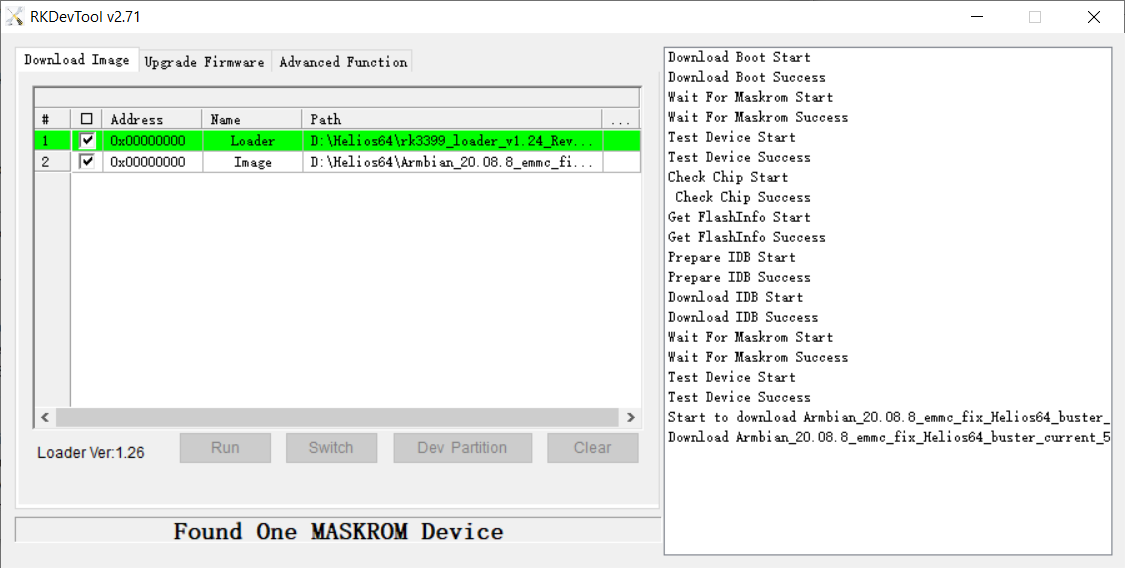
2. Run AndroidTool.exe and check whether there is Found One MASKROM Device.
3. Click rows to load and select following files:
-
Loader = rk3399_loader_v1.24_RevNocRL.126.bin
-
Image = Helios64 OS image to write
Warning
The image must be Raw image, not in compressed form.
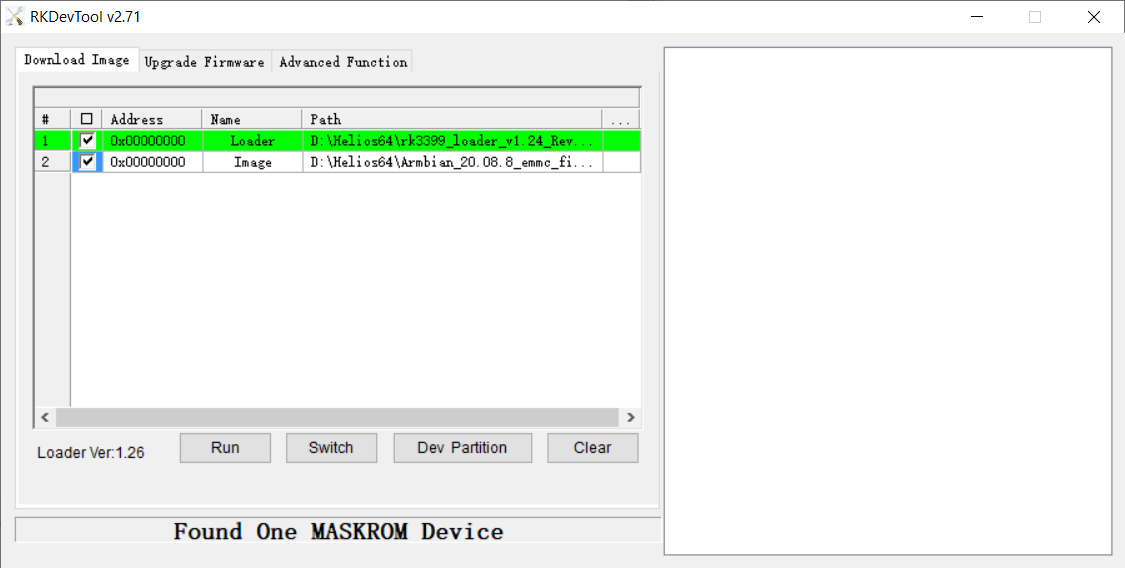
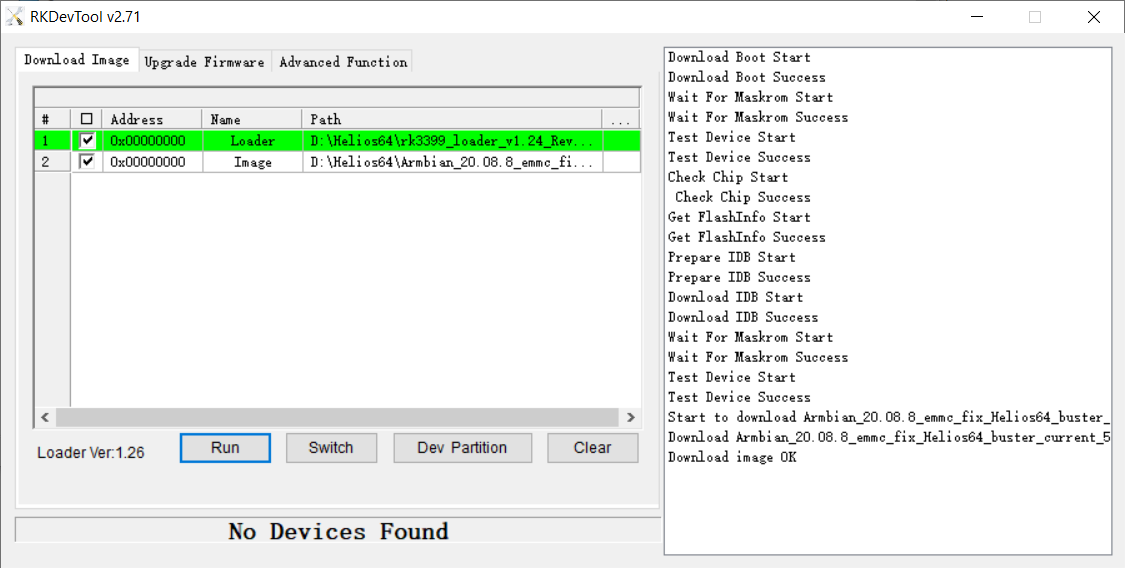
4. Checklist both row and press Run button. Observer the log textbox.
5. The log textbox will show Download image OK when finished and system will automatically reboot.
6. Remove jumper on P13, you should have USB Serial connected to your PC.
7. Continue to setup the OS through Serial Console.
Under Linux
1. Verify whether rockusb device is recognized.
lsusb -d 2207:330c
It should return something like:
Bus 001 Device 014: ID 2207:330c Fuzhou Rockchip Electronics Company RK3399 in Mask ROM mode
2. Open terminal under rkbin-master folder.
3. Send loader to Helios64
sudo tools/rkdeveloptool db rk3399_loader_v1.24_RevNocRL.126.bin
4. Write OS image to eMMC
sudo tools/rkdeveloptool wl 0 /path/to/os_image.img
Warning
The image must be Raw image, not in compressed form.
5. After image writing finished, reset the system
sudo tools/rkdeveloptool rd
6. Remove jumper on P13, you should have USB Serial connected to your PC.
7. Continue to setup the OS through Serial Console.
References
Rkdeveloptool - Rockchip Open Source Document
Rockusb - Rockchip Open Source Document