OpenMediaVault
This is a basic guide to help you setting up Helios4 NAS with OpenMediaVault (OMV). OMV offers a large collection of features that we don't cover here. We invite you to look online for the existing OMV guides or go on the OMV forum.
What is OpenMediaVault?
OpenMediaVault (OMV) is a next-gen network attached storage (NAS) software based on Debian Linux. It contains services like SSH, (S)FTP, SMB/CIFS, DAAP media server, RSync, BitTorrent client and many more... all configurable via a Web Control Panel. Thanks to a modular framework design, new features can be added to OMV via plugins. It is a simple and easy to use out-of-the-box solution that will allow everyone to install and administrate a Network Attached Storage without deeper knowledge.
Install Openmediavault
Important
You should first update your system to ensure you are using the latest armbian-config tool.
sudo apt-get update && sudo apt-get upgrade
You can easily install OMV with the armbian-config tool.
Connect to your Helios4 via SSH as explained here.
Launch armbian-config and follow the steps.
sudo armbian-config
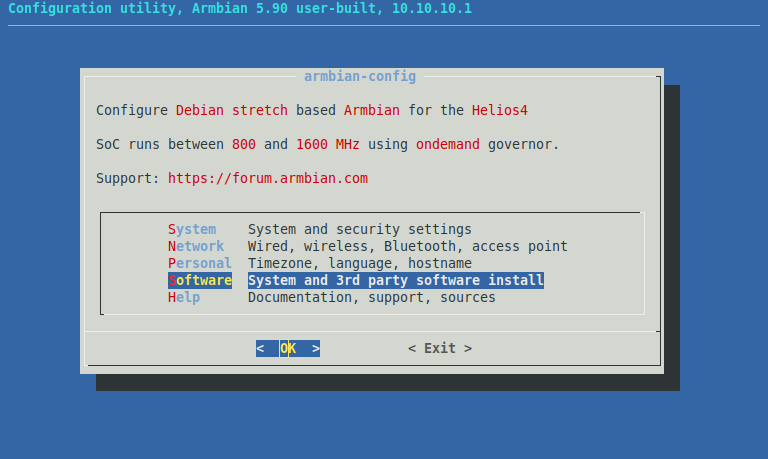
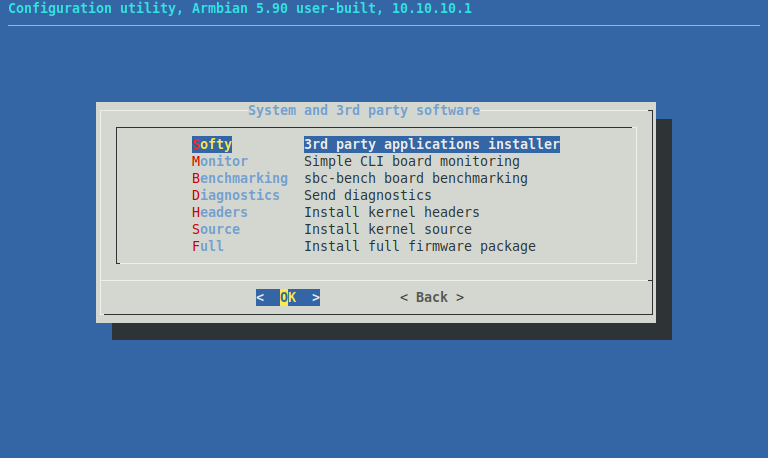
Select OMV and press Install.

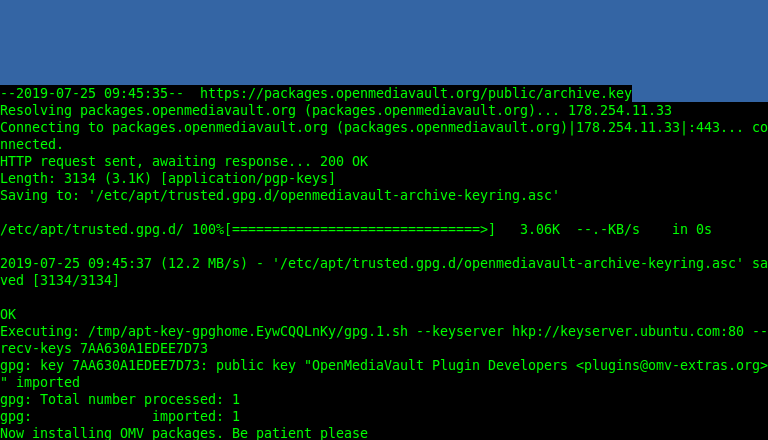
This is what you will see during the installation.
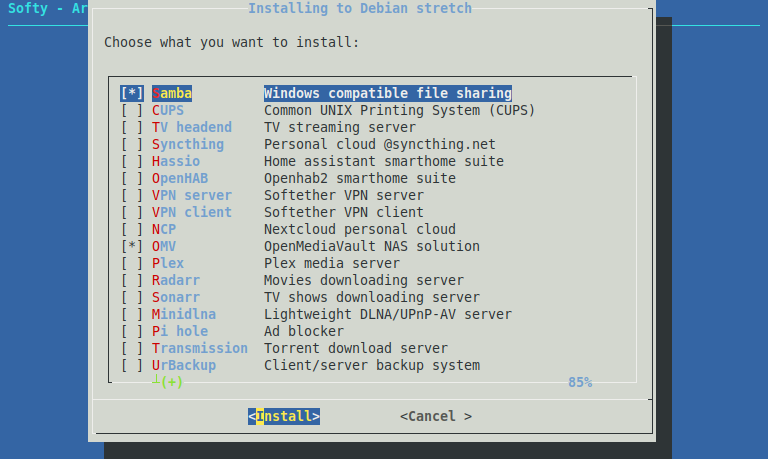
When installation is completed, you should see the following menu with Samba and OMV shown as installed.
Now press ESC till you exit armbian-config tool.
You might want to reboot to be sure all OMV services are started properly.
sudo reboot
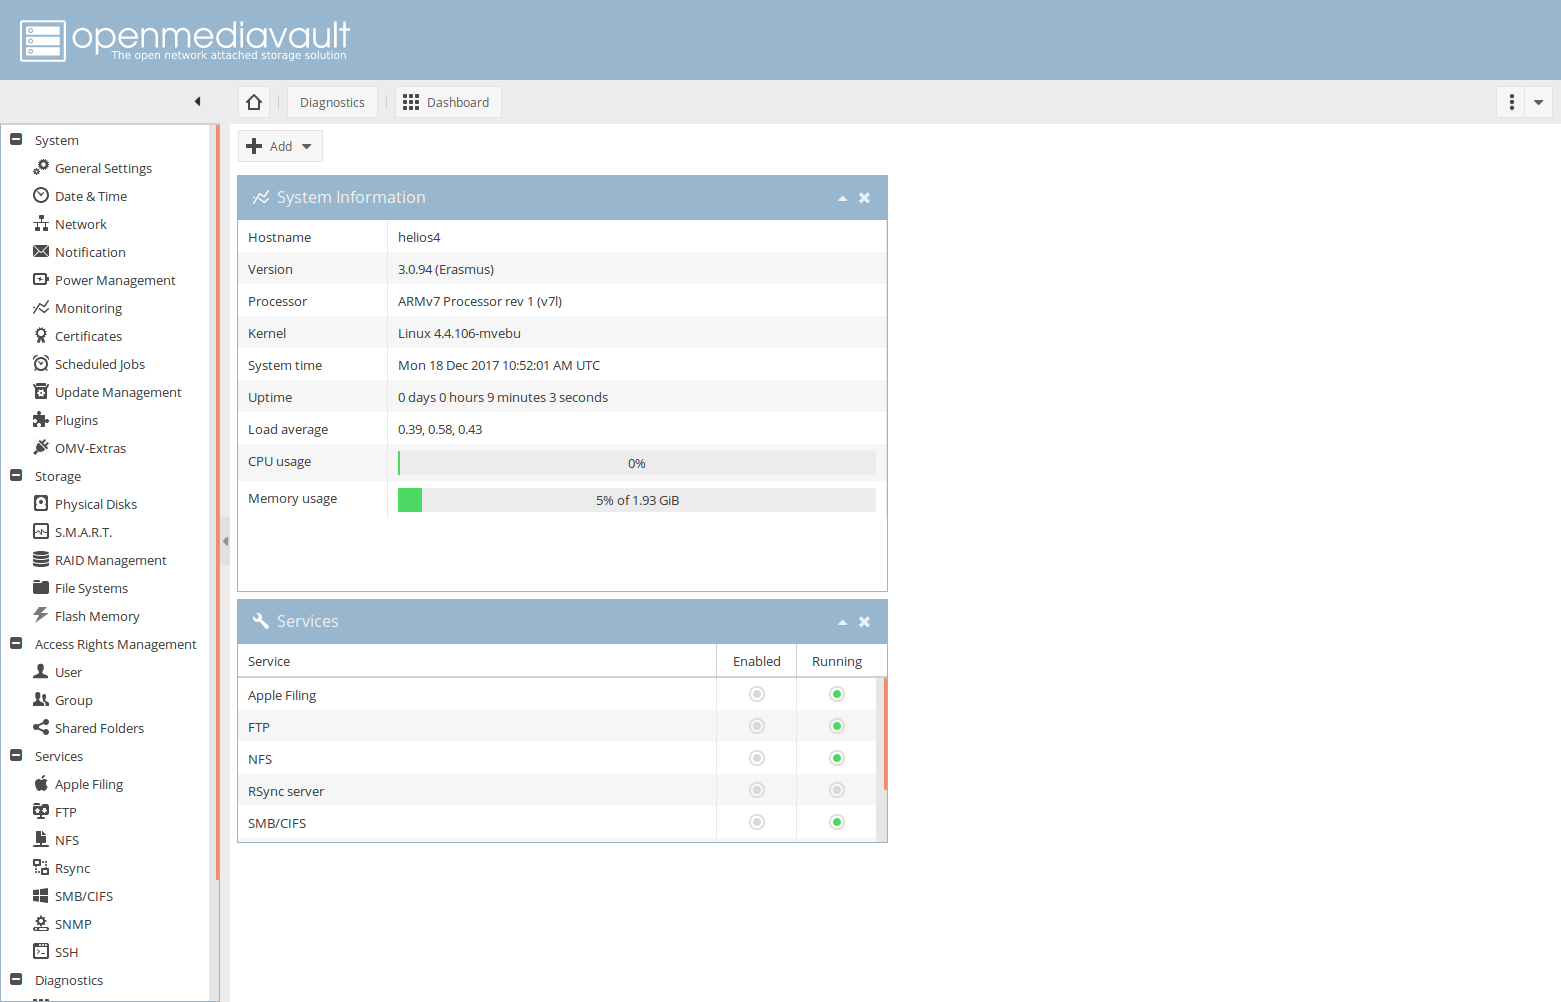
Connect to OpenMediaVault (OMV) Control Panel
Open your web browser and go to the one of the following addresses :
- http://helios4.local
- http://xxx.xxx.xxx.xxx (How to check Helios4 IP address)
Default credential :
- Username: admin
- Password: openmediavault

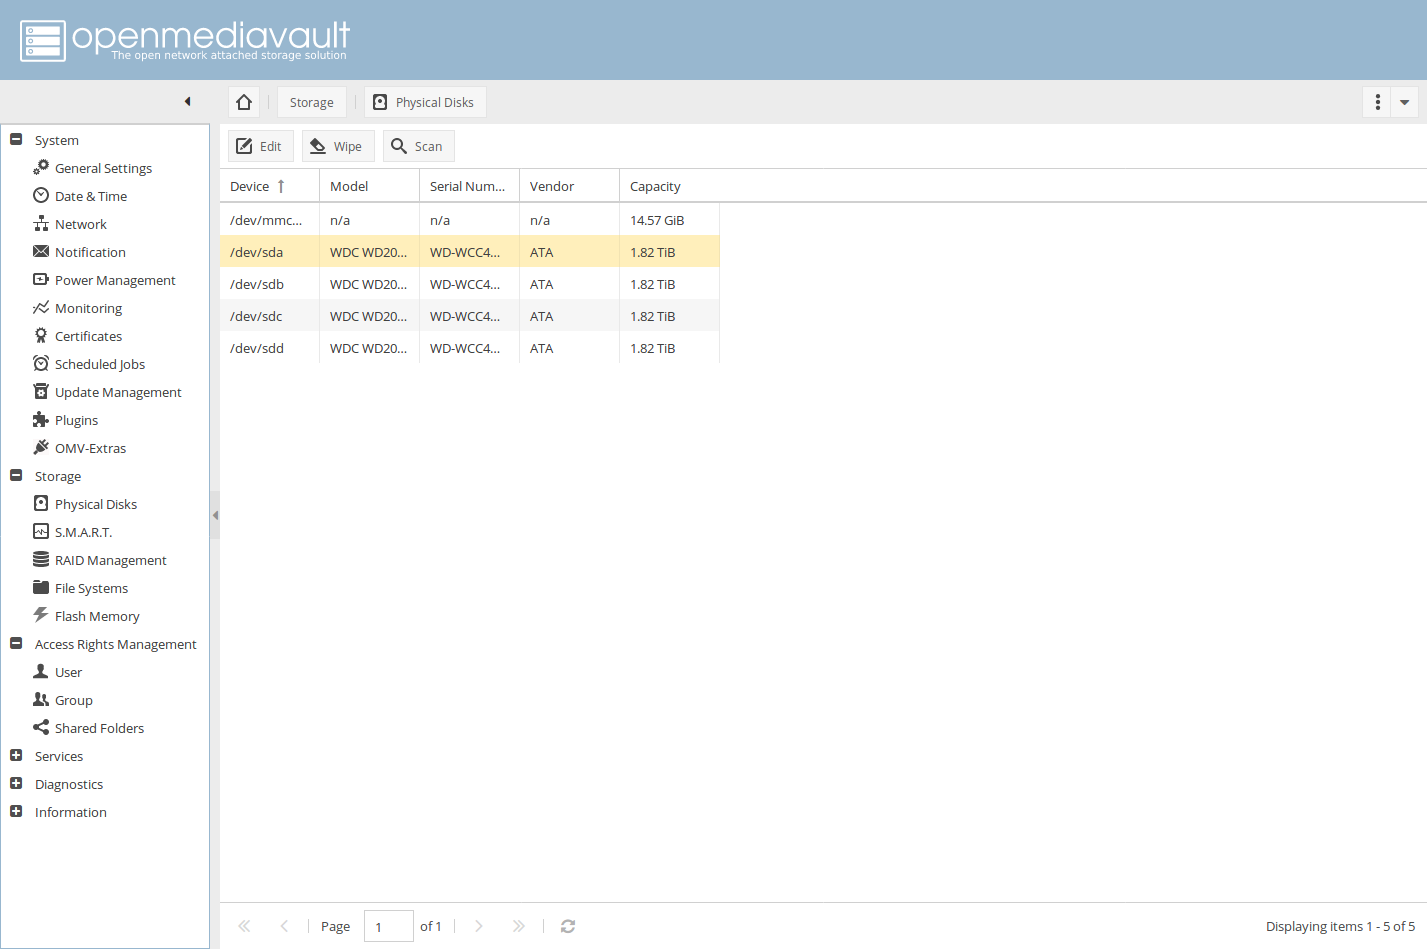
Wipe Disk (Optional)
If you are using HDDs which aren't blank or brand new you might need to wipe them first before being able to setup a RAID array.
Go to Physical Disks page in Storage section.
Select an HDD and click Wipe.
Note
HDDs are the devices starting with /dev/sdX
Click Quick wipe method.
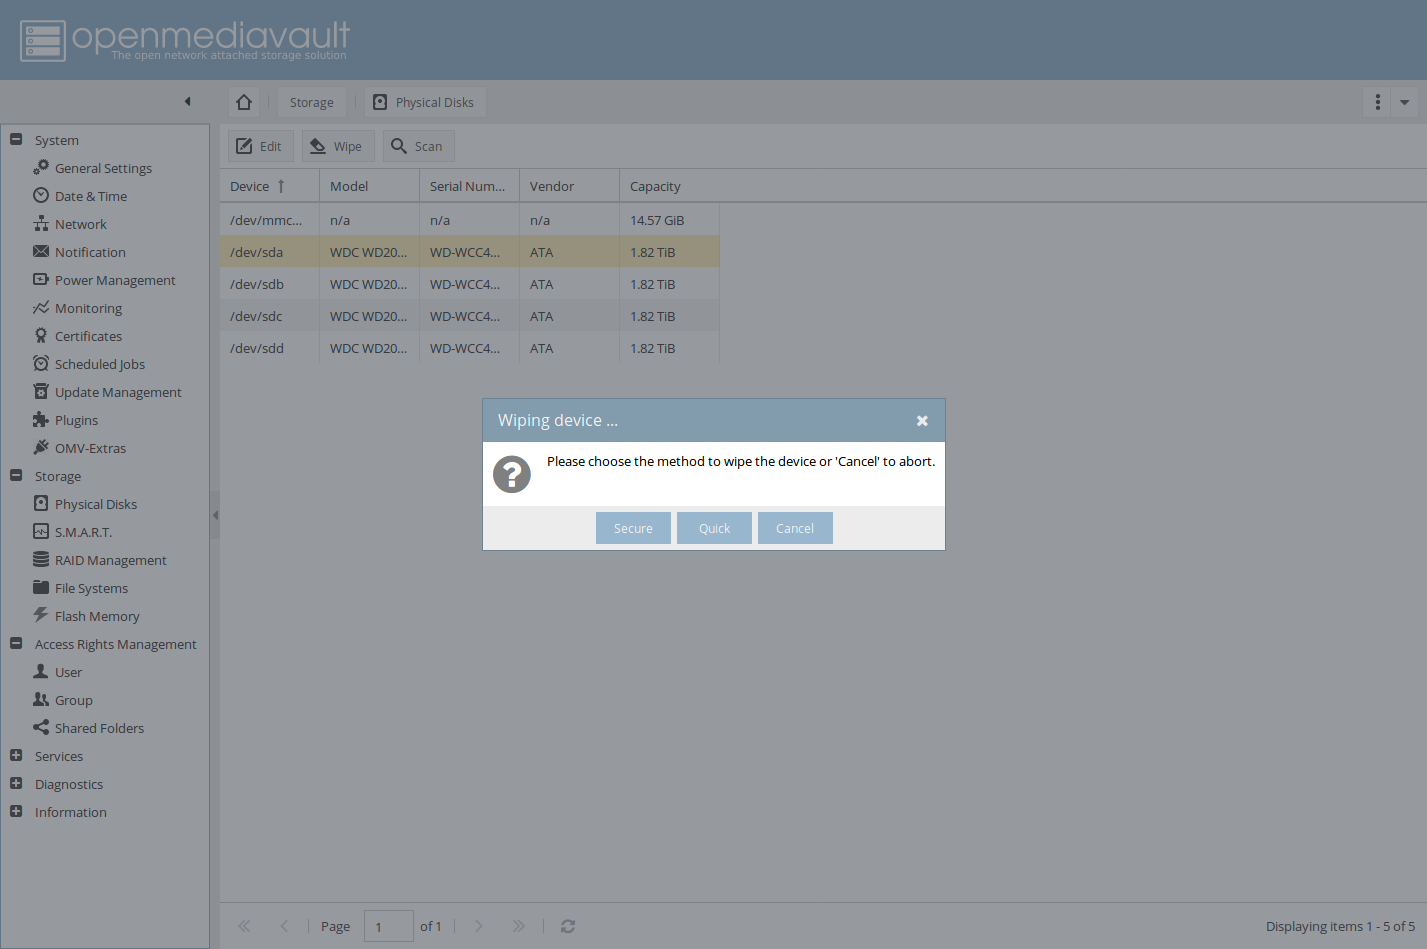
Repeat above steps for each HDD you want to use for your RAID array.
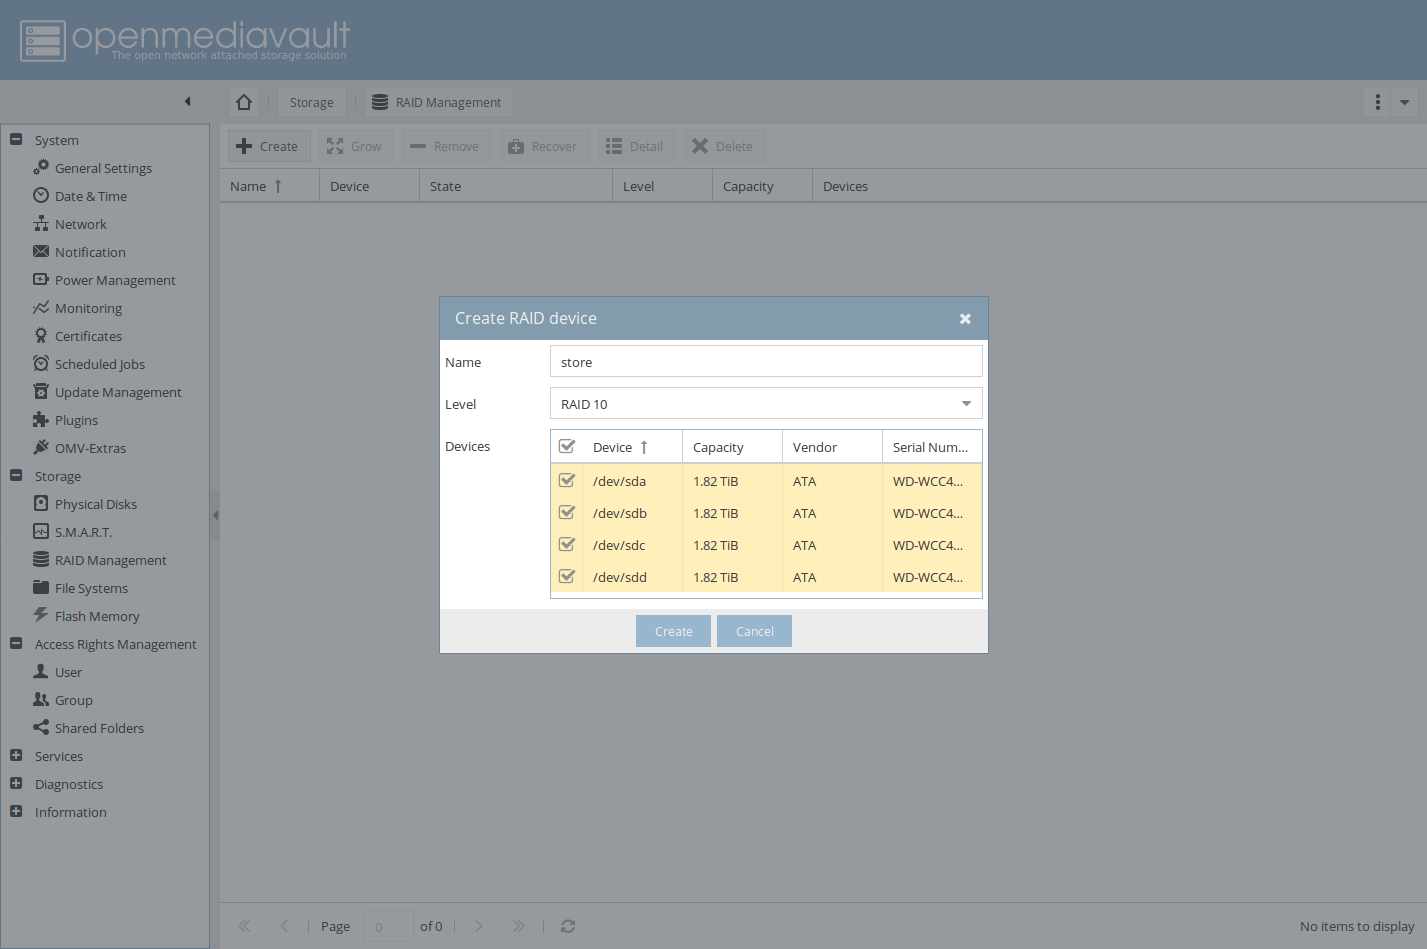
Create a RAID array
In this guide we chose to create a RAID10 with 4 HDDs for the following reasons :
- Best performance, less compute intensive.
- Fastest (re)build, less performance degradation.
- Support up to 2 disk failures, but not every 2 disk failures combination like RAID6.
Info
You can choose to go for RAID6 but take in consideration that the building will take up to 3 times the building time of RAID10. There are plenty of threads online which compare the pros and cons between each RAID option.
Go to RAID Management page in Storage section.
Click Create.
Select RAID level and the devices you want to use for the RAID array.
Give it a name and click Create.
You can see the ongoing build / re-syncing process and get an estimated finish time.
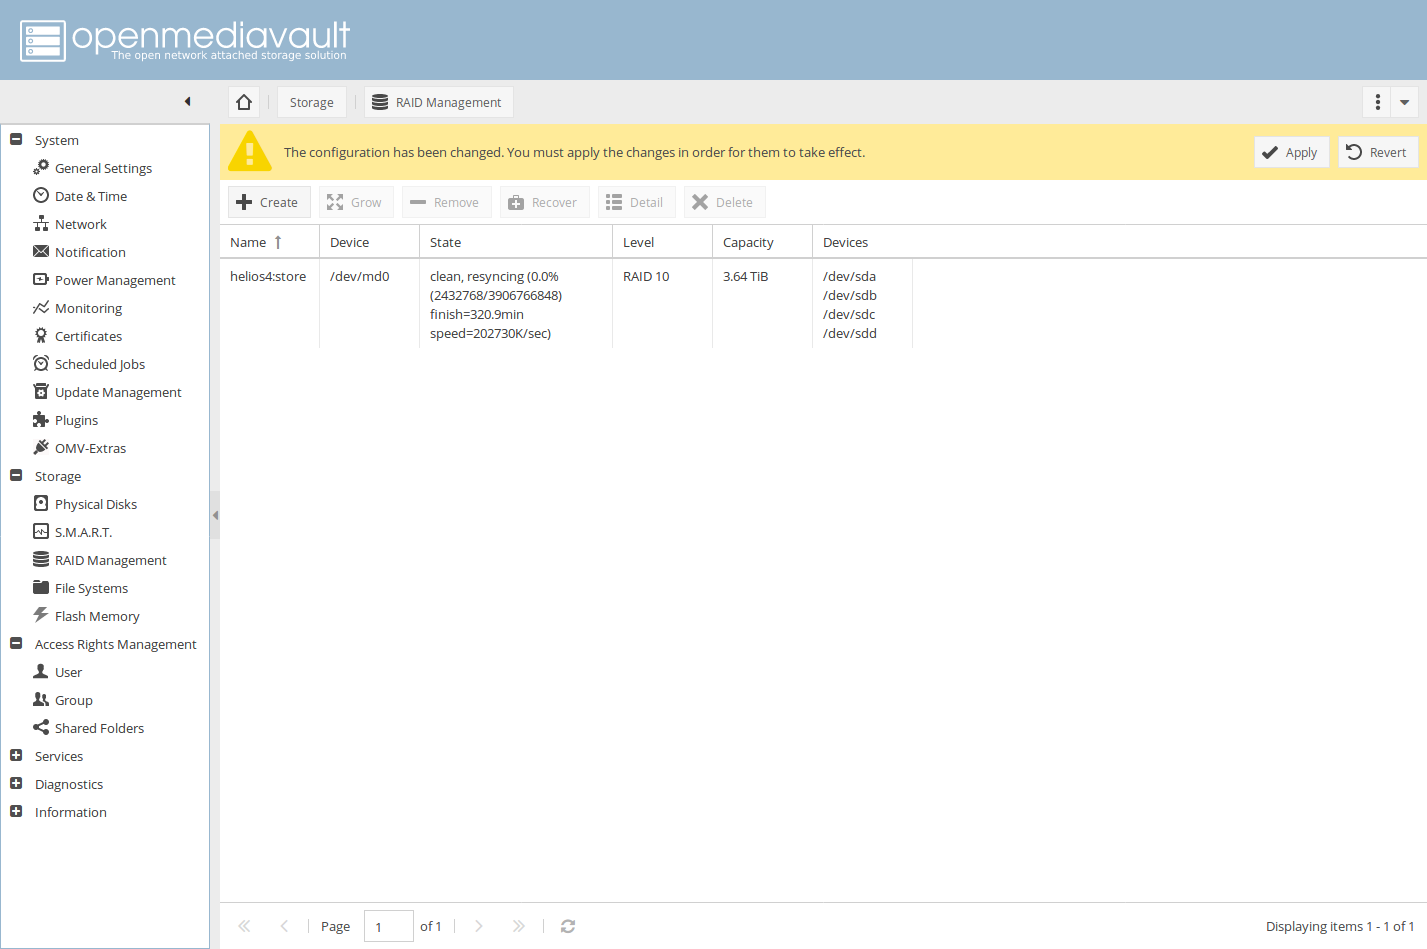
Important
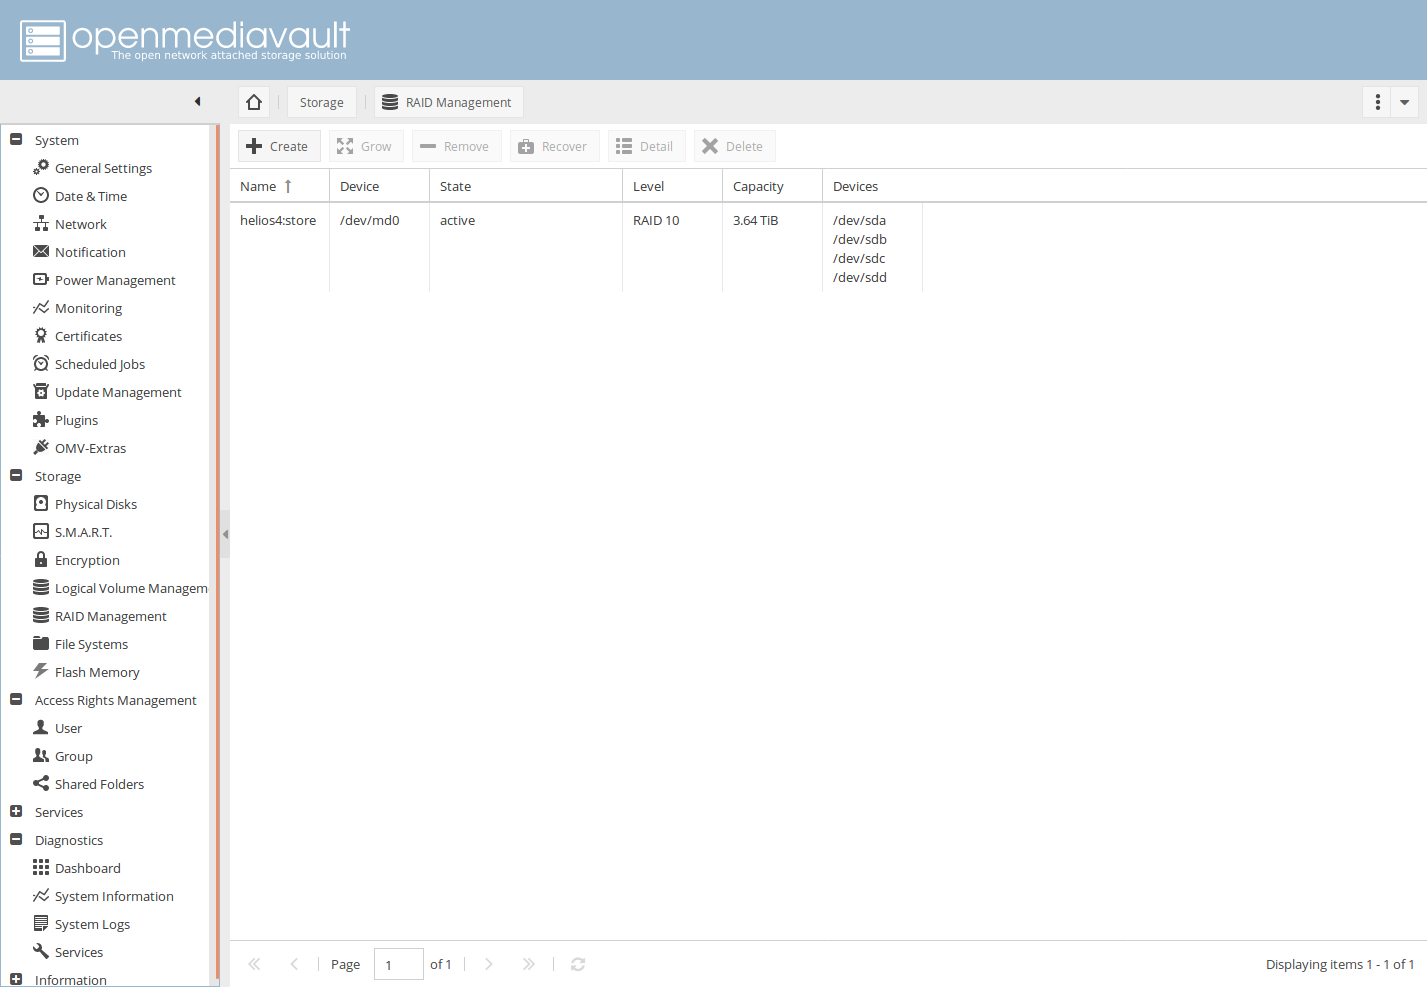
While you could carry on with some part of OMV configuration during the RAID re-syncing process, we strongly advice to let this process complete first. You should see the following in the RAID state once re-syncing is complete : active.
Note
If your system is configured to display RAID fault on the LED2, then you should also see the red LED2 blinking while your array is (re-)syncing.
Info
Whenever you change some settings in OMV, the following banner will appear. You can immediately apply the configuration by clicking Apply or you can carry on with your configuration and apply the changes at a later stage.

Install LVM Plugin
To have a better control of storage partitioning we will use Linux Logical Volume Manager (LVM). To create Logical Volume in OMV you will need first to install the LVM plugin.
Go to Plugins page in System section.
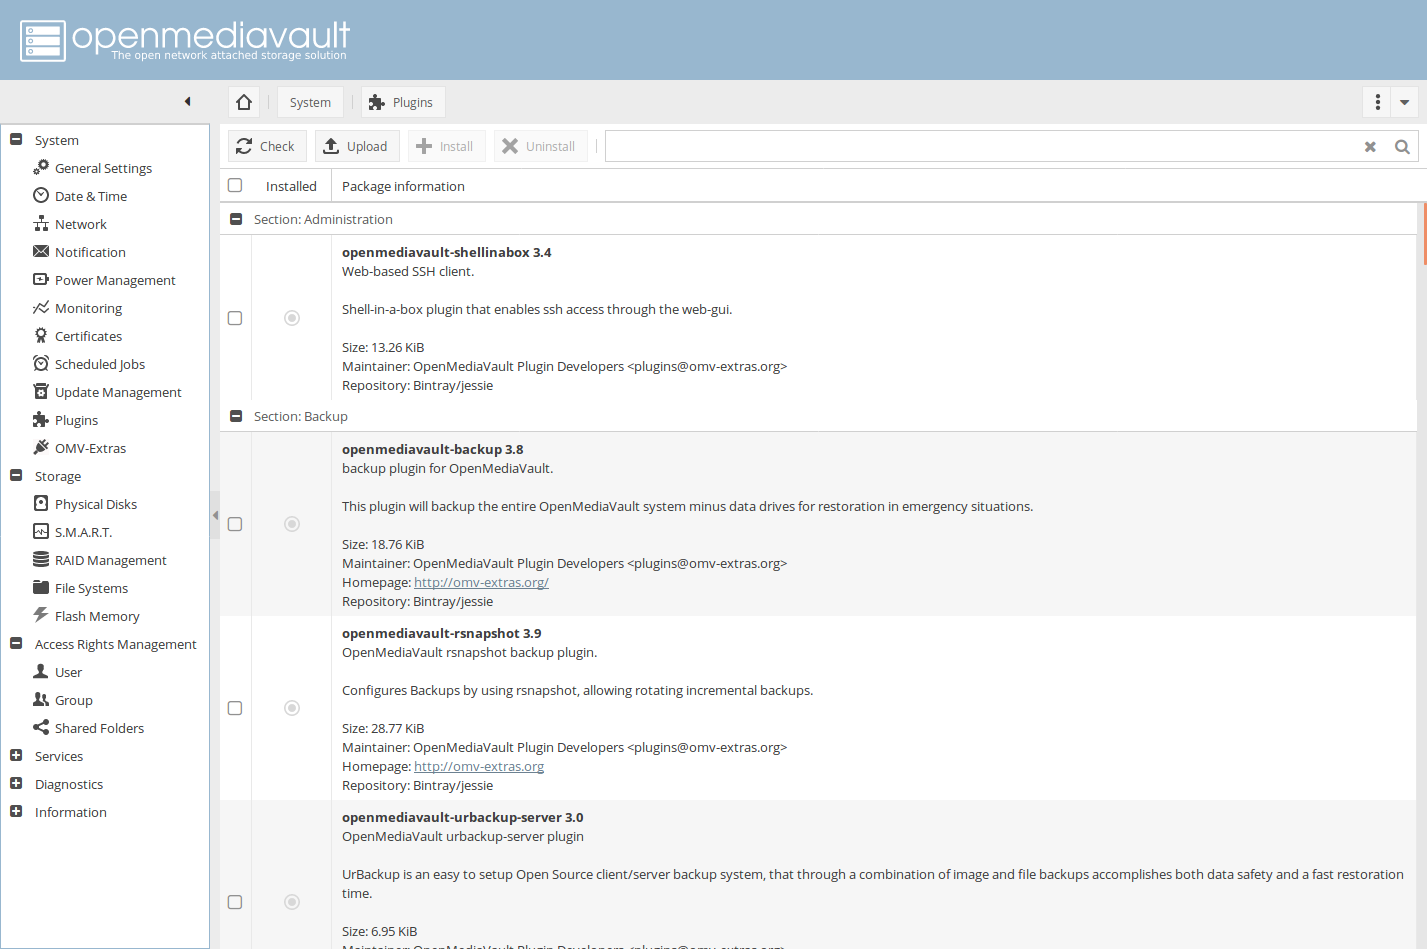
To get the latest plugins you will need to update the plugins database.
Click Check

Once plugins database update is done :
Search for lvm in the search field.
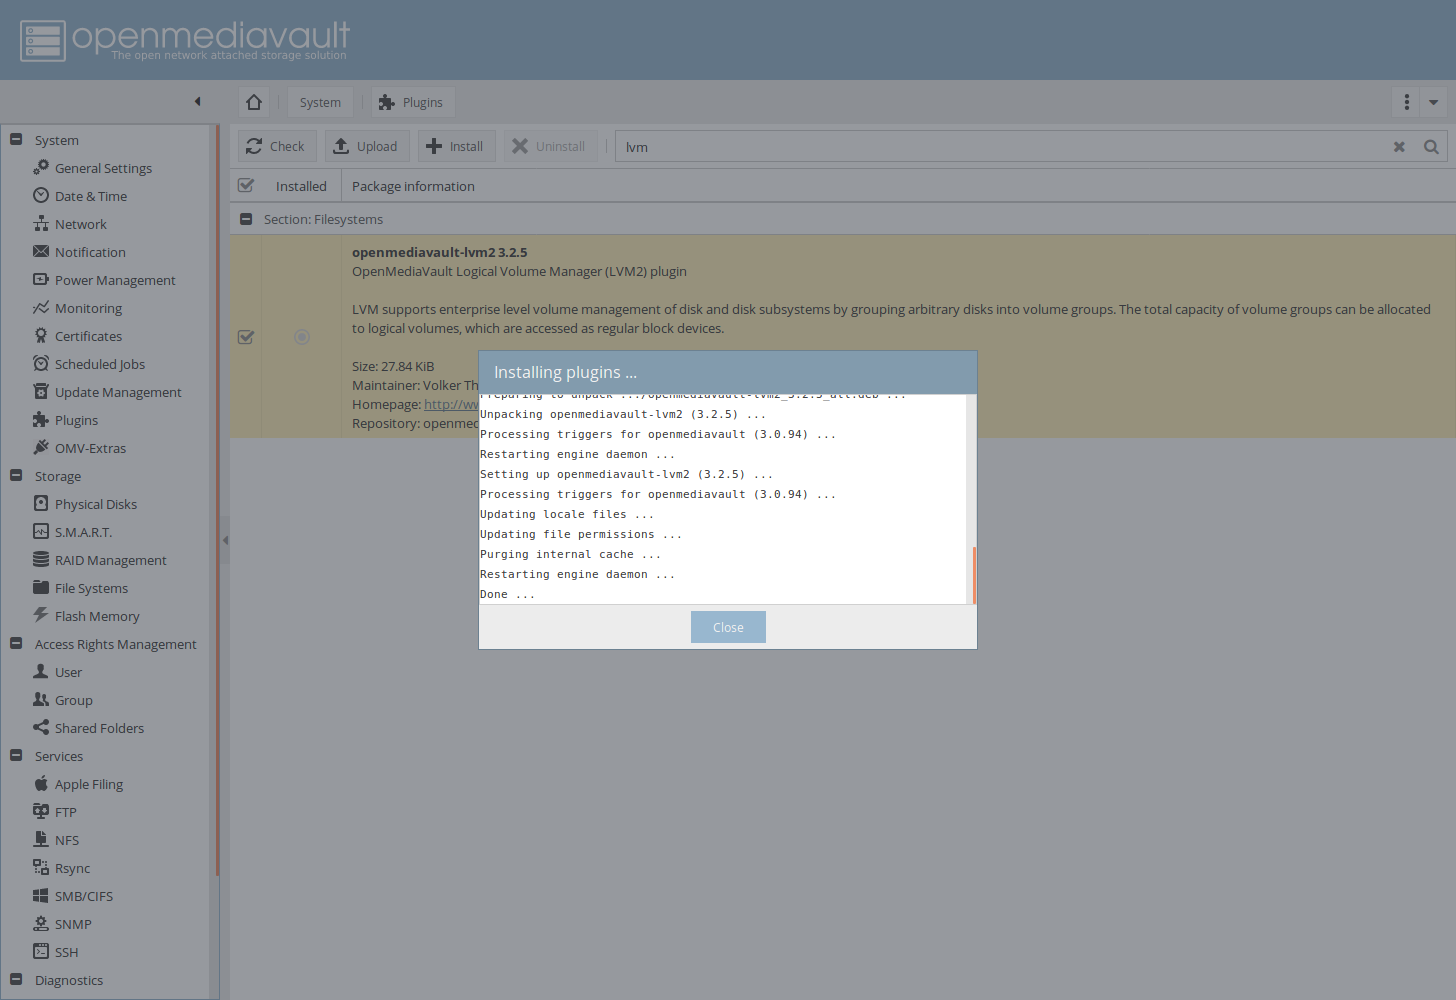
Select openmediavault-lvm2 and click Install.
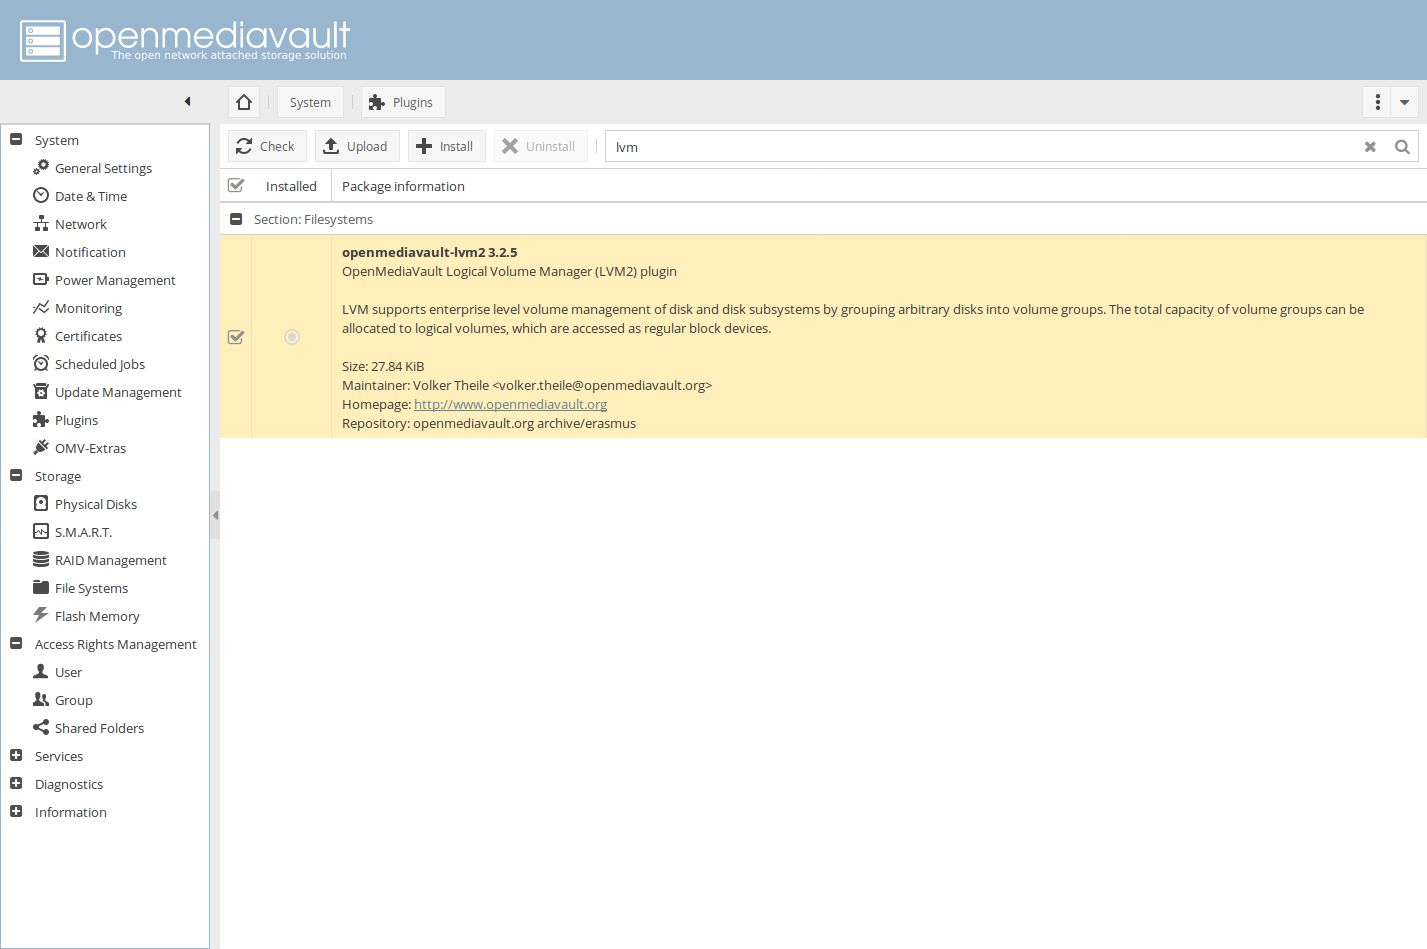
Wait till the lvm plugins install shows Done... then click Close.
Info
OMV Control Panel will reload and you should see the Logical Volume Management page in Storage section.
Create a LVM Logical Volume
To create a Logical Volume 3 steps are necessary :
- Add a Physical Volume. (The RAID array you created previously)
- Add a Volume Group. (Volume Group contains Physical Volumes)
- Add one ore more Logical Volumes. (Logical Volumes are like partitions)
Note
The Helios4 System-On-Chip is a 32bit architecture, therefore the max volume size supported is 16TB. If your RAID array is more than 16TB of usable space, then you will need to create more than just one Logical Volume to take advantage of all the available space.
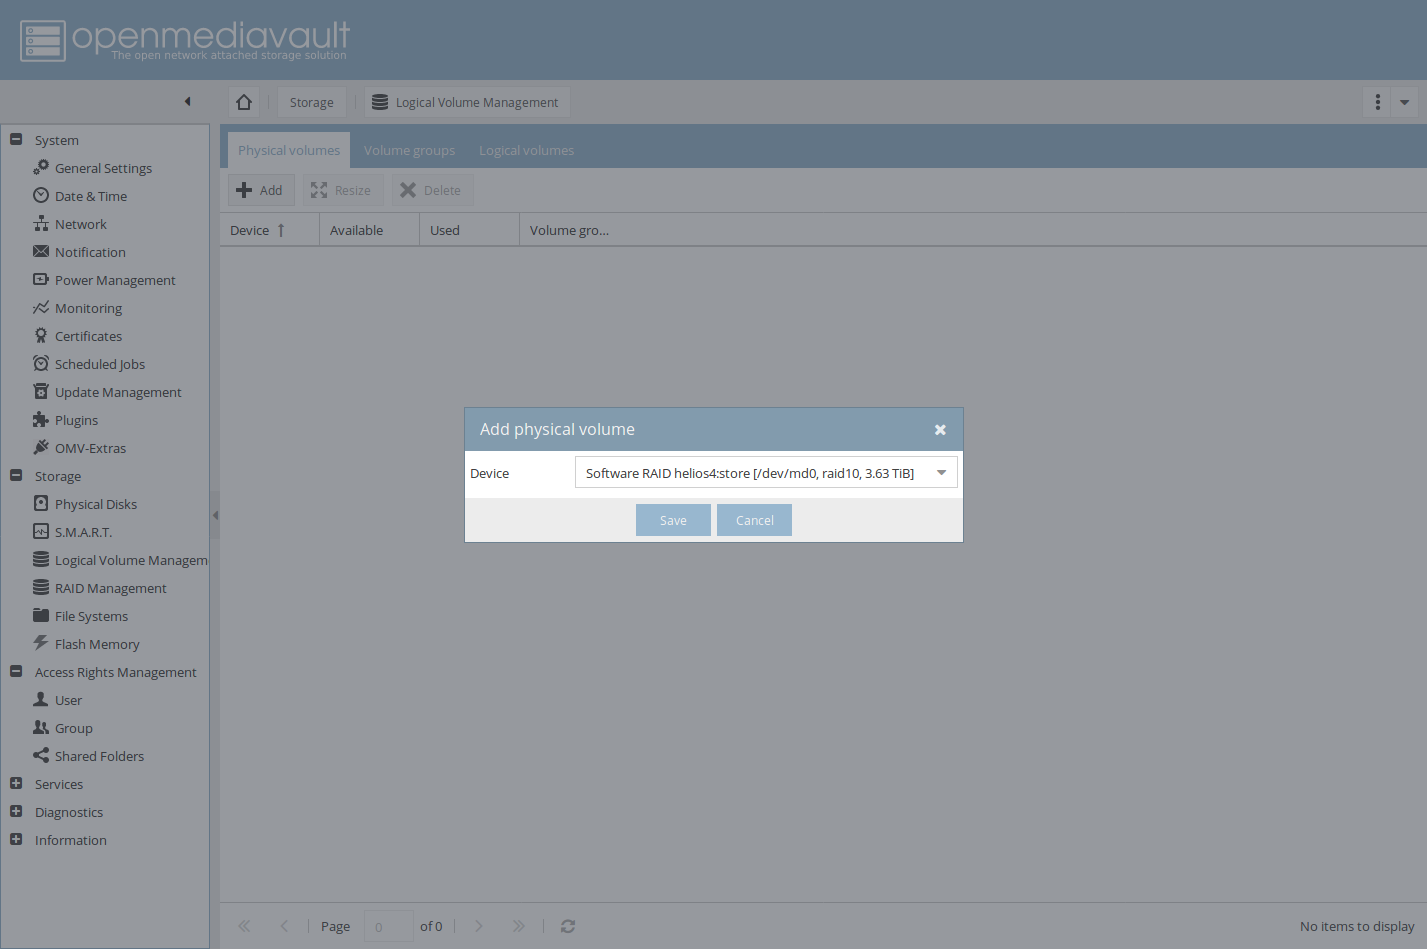
Go to Logical Volume Management page in Storage section.
Click Add under Physical Volumes tab.
Select the RAID array you created previously and click Save.
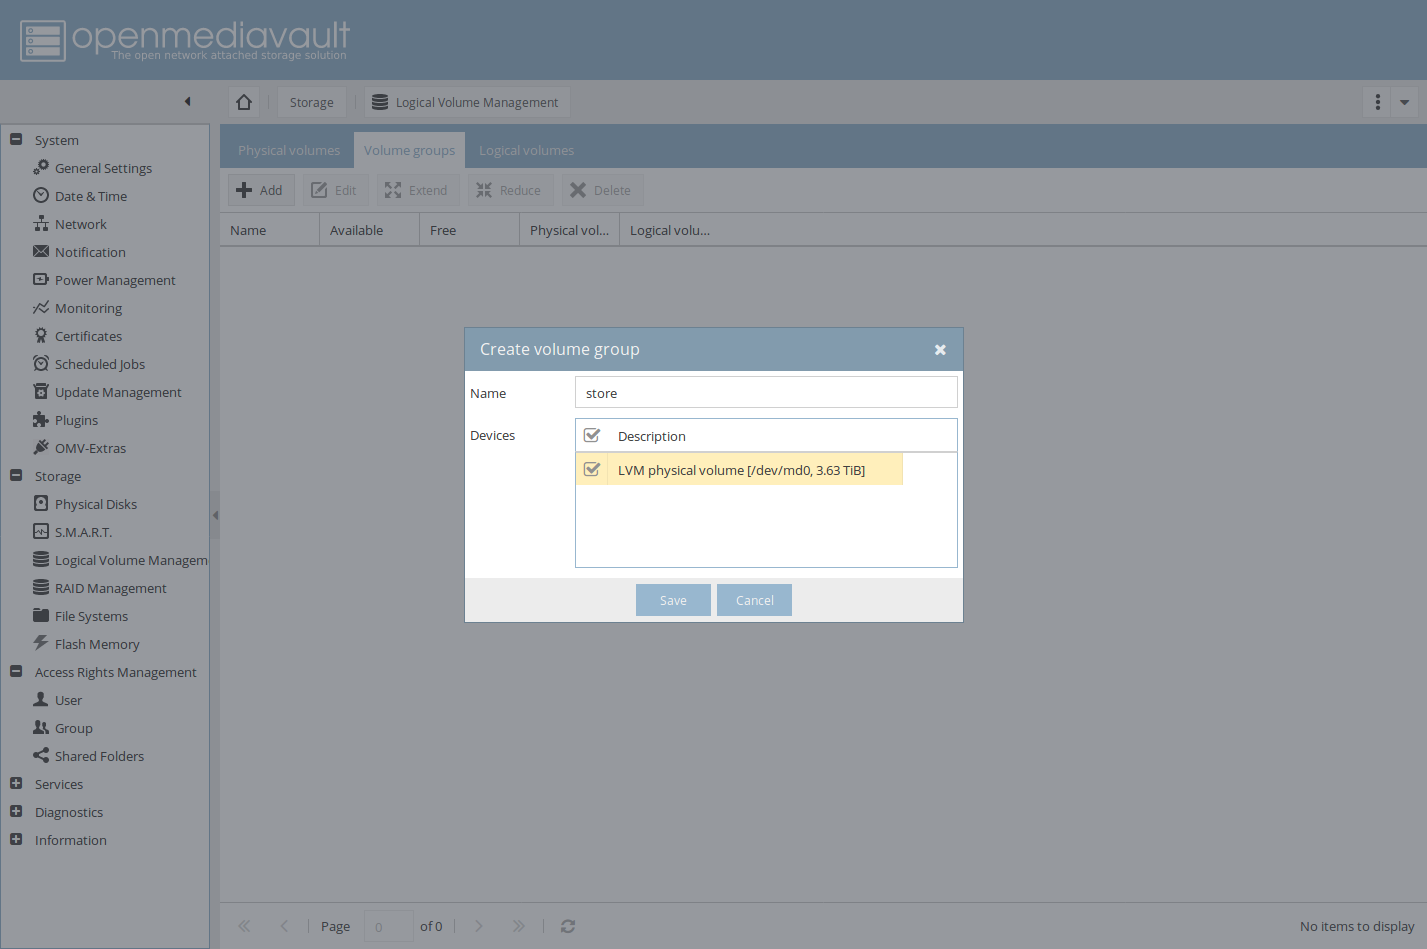
Go to Volume groups tab.
Click Add.
Select the Physical Volume you just created.
Give it a name and click Save.
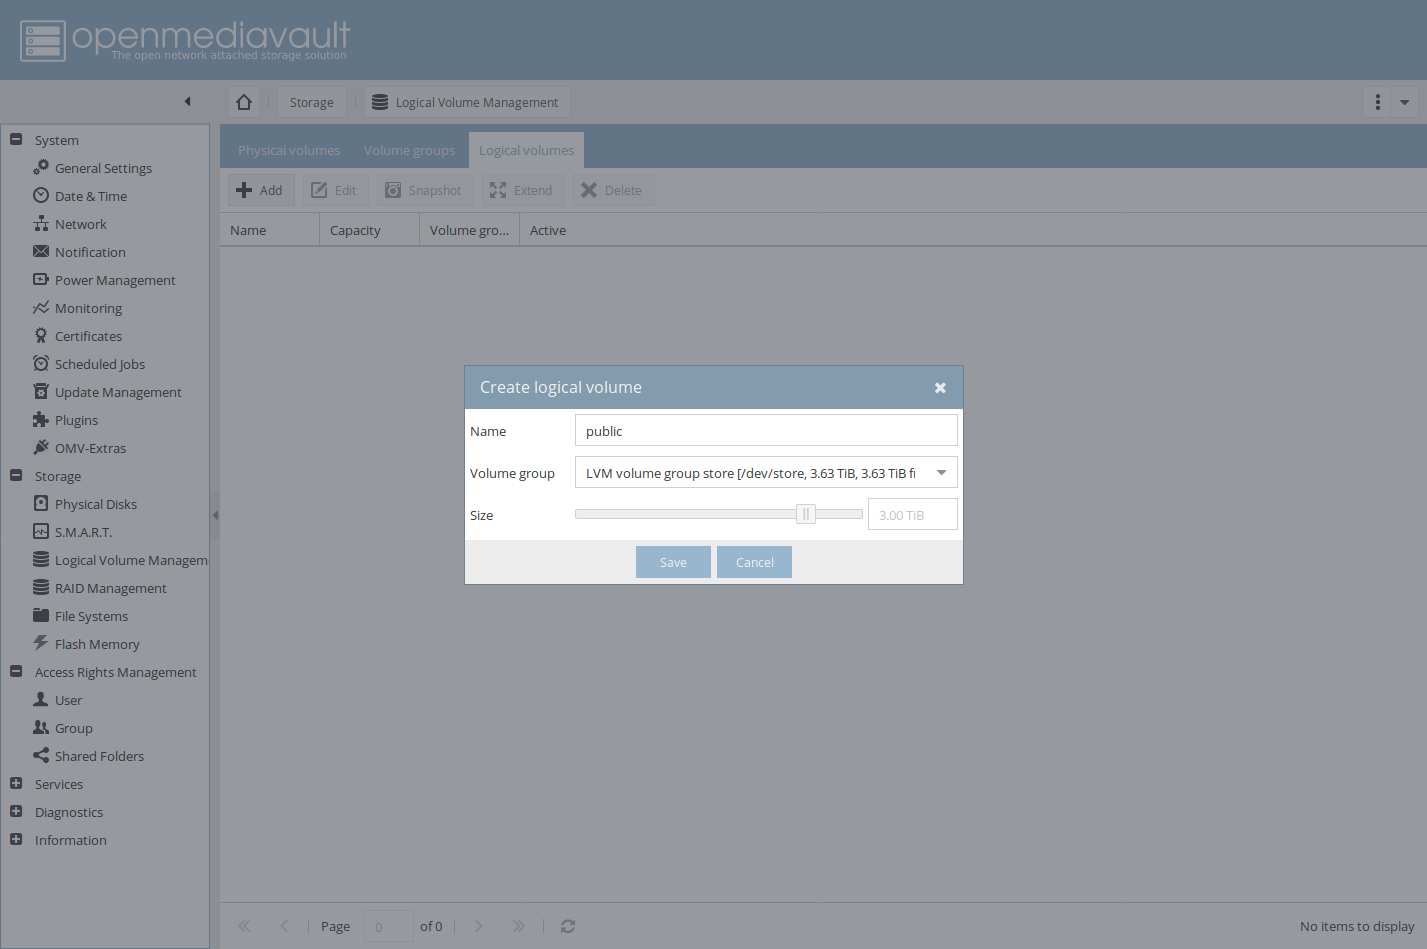
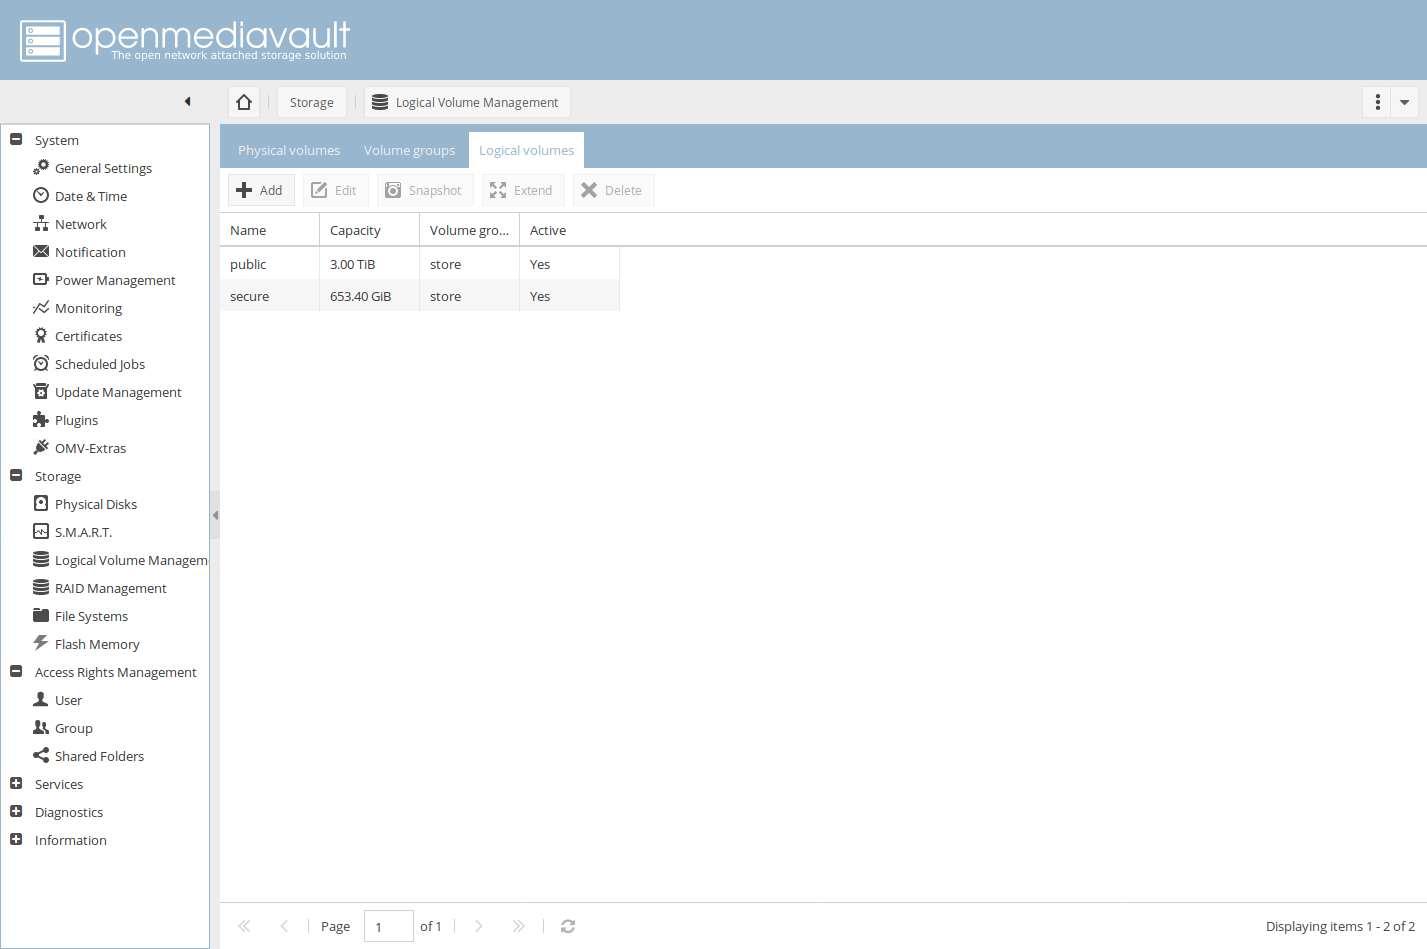
Go to Logical volumes tab.
Click Add.
Select the Volume Group you just created.
Choose a partition size.
Give it a name and click Save.
Info
You can create several Logical Volumes according to your needs and the way you want to organize your data.
In the current example we created 2 volumes :
- public : to put all non-sensitive data like movie & music collections.
- secure : to setup an encrypted space for sensitive data (not covered in this guide).
Format and Mount Volume
Now that your Logical Volumes are created, you need to format and mount them in order to use them.
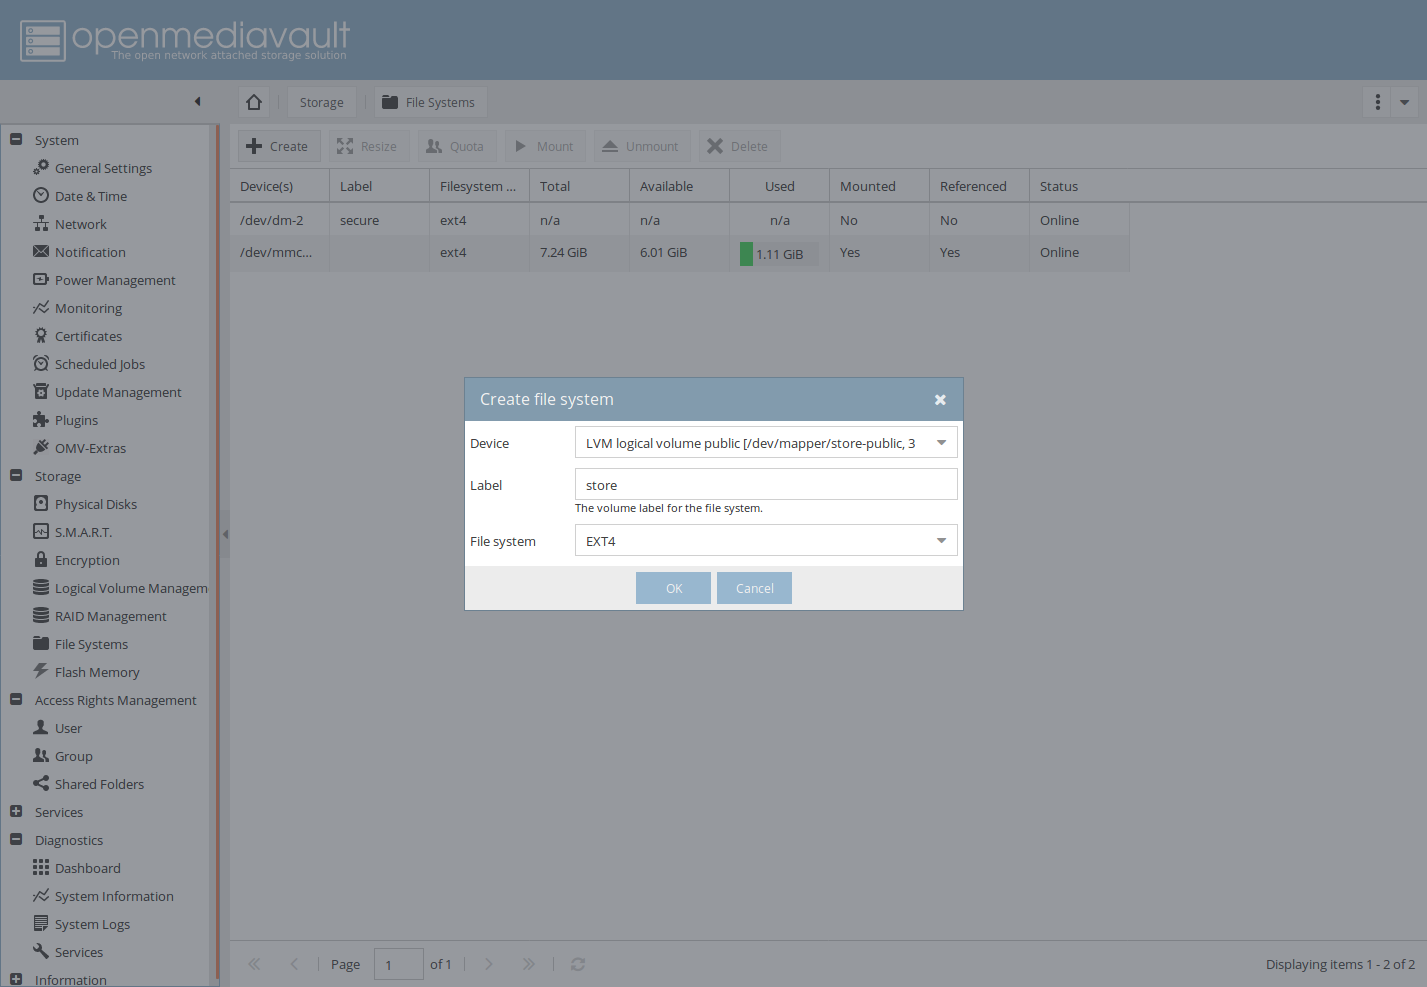
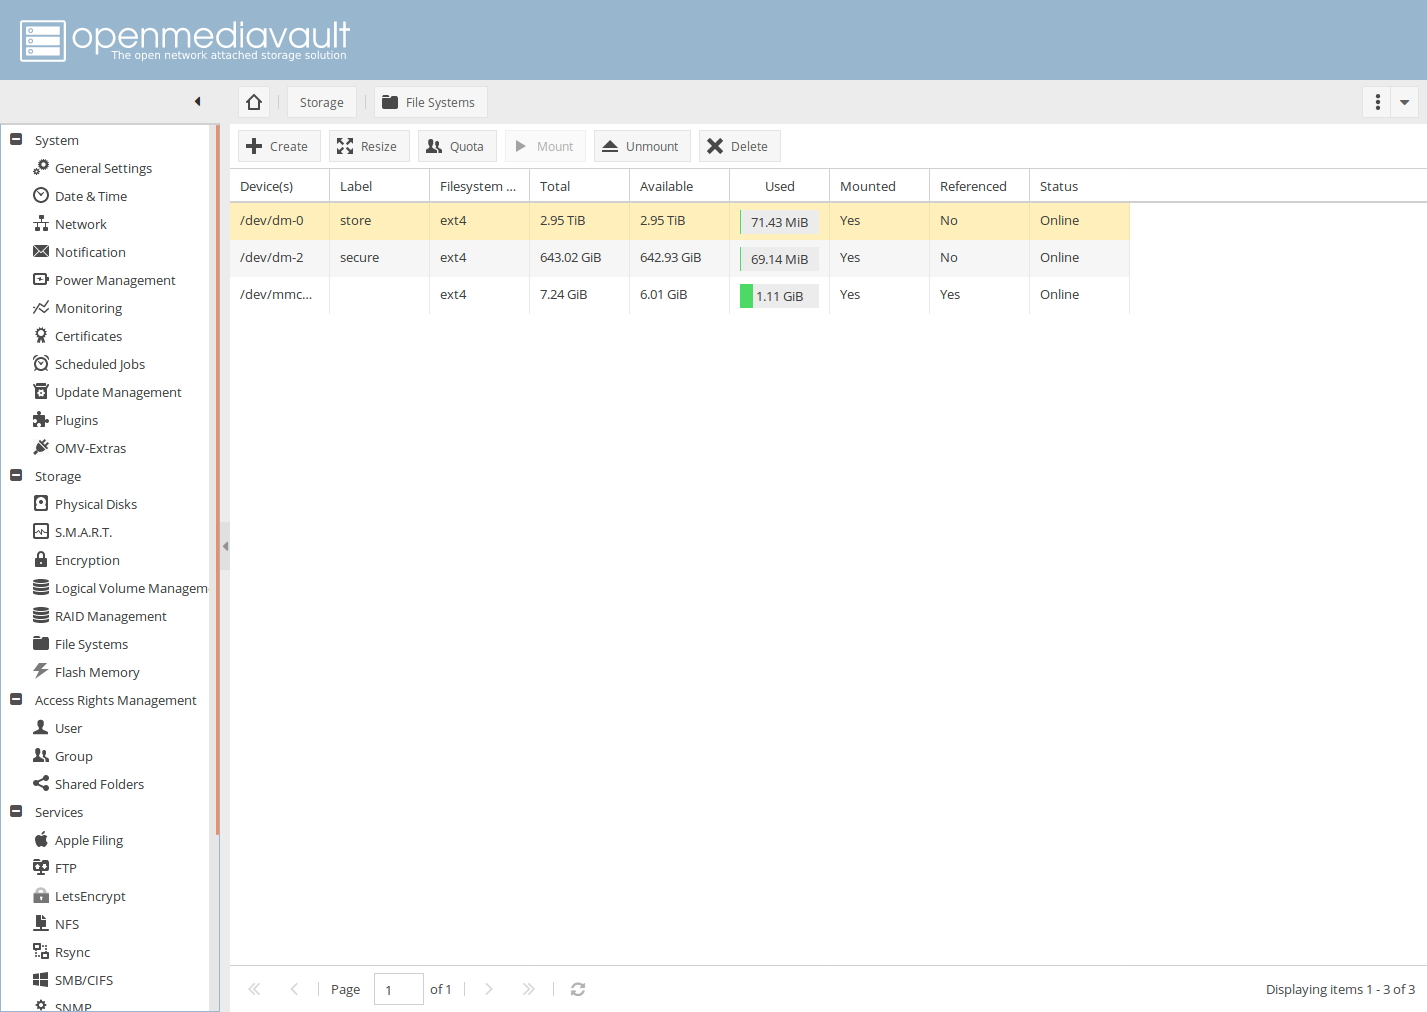
Go to File System page in Storage section.
Click Create
Choose a Logical Volume you created.
Choose a File system type (e.g EXT4).
Give it a label and click OK.
Info
While you could choose BTRFS as a copy-on-write File system (COW), we recommend to use to EXT4 unless you know how to take advantage of BTRFS features.
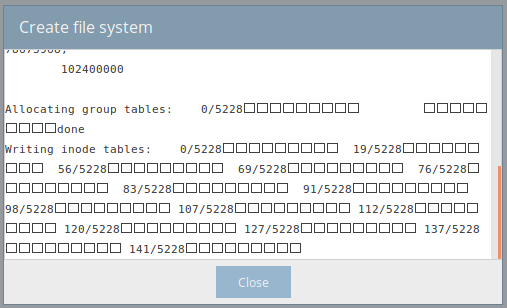
You can see the ongoing formatting process. You don't have to wait the process to finish.
Click Close.
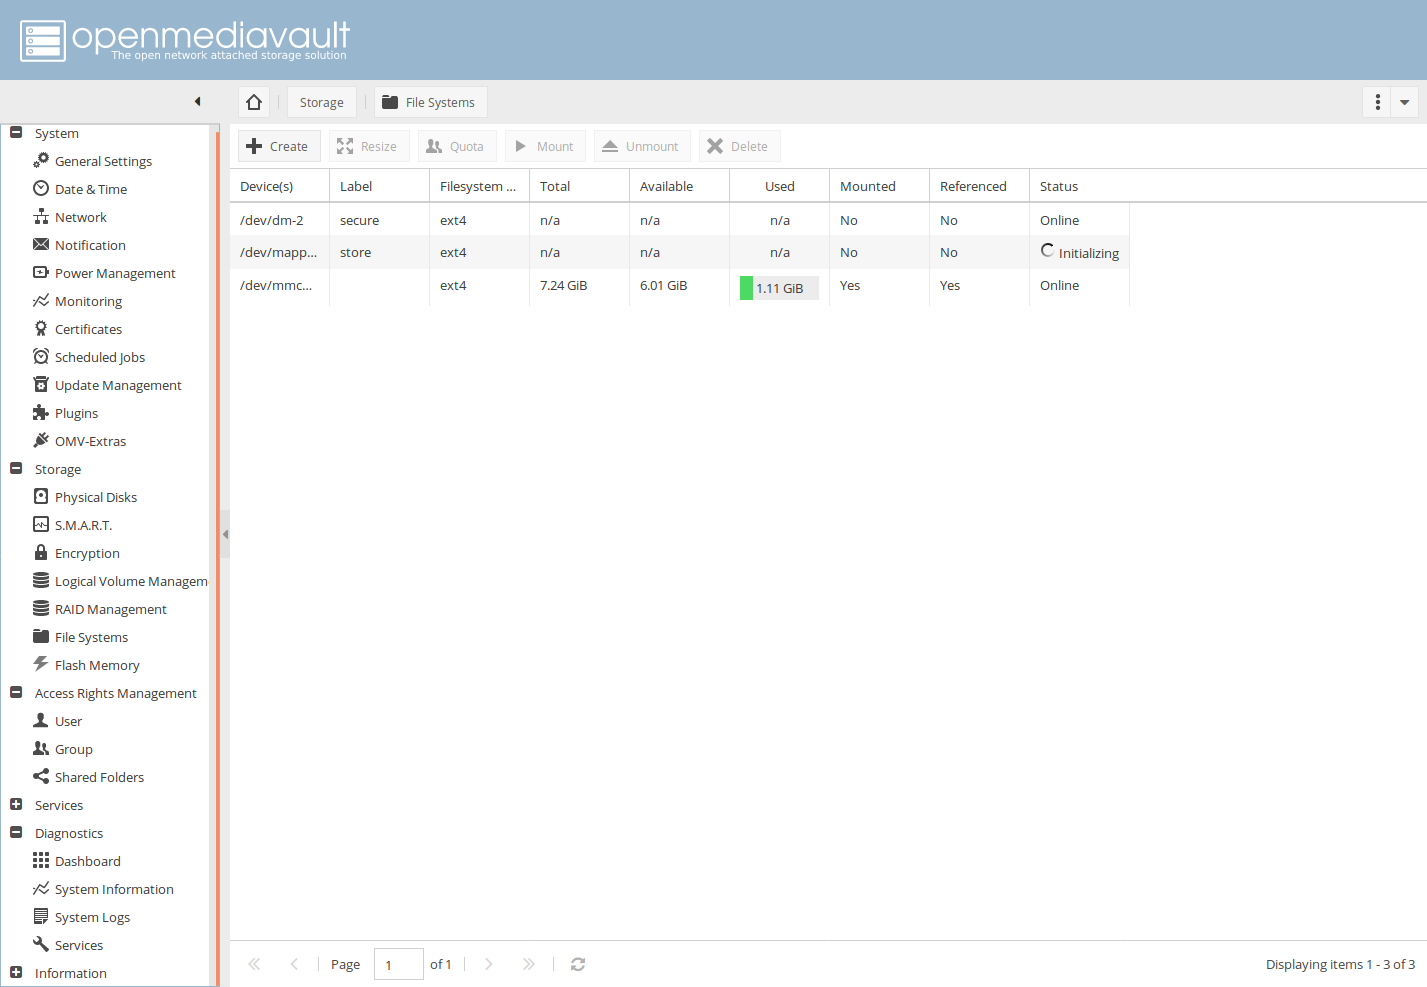
You can check the status of all devices.
Once formatting process is complete, device status will show Online.
Info
Depending on your Logical Volume size, formatting can take a while to complete.
Select device you formatted and click Mount.
Repeat the action for each Logical Volume you created.
Create User
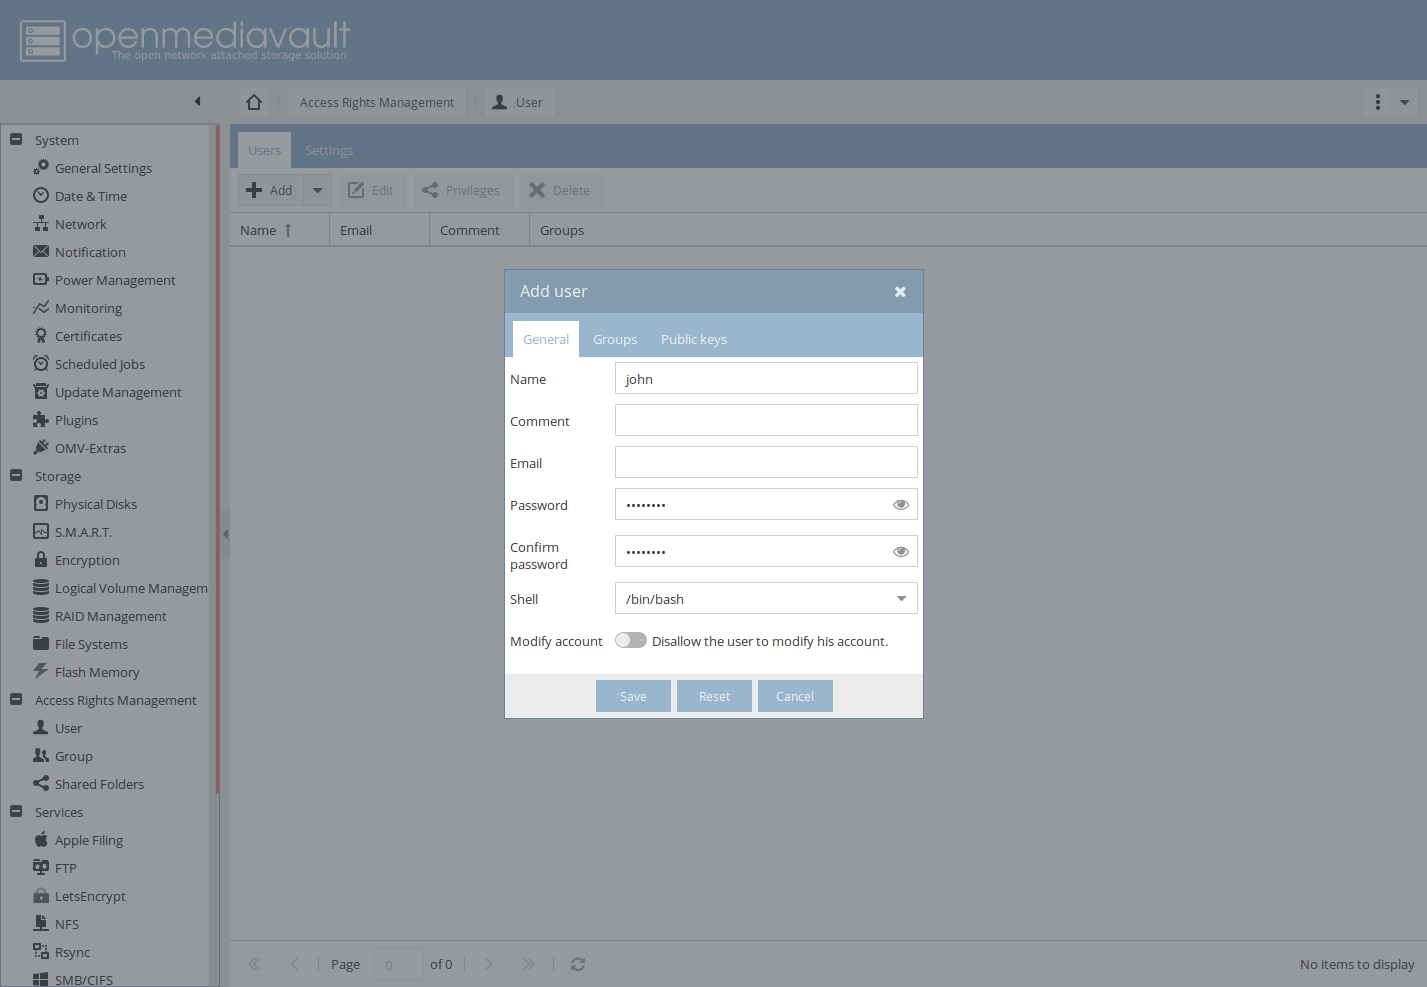
In this guide we will create a super user john that will have the write access on the share folders we will create. We will also give SSH access and sudo right to this user.
Go to User page in Access Rights Management section.
Click Add under Users tab.
Fill Name and Password section.
Select /bin/bash for Shell (Optional).
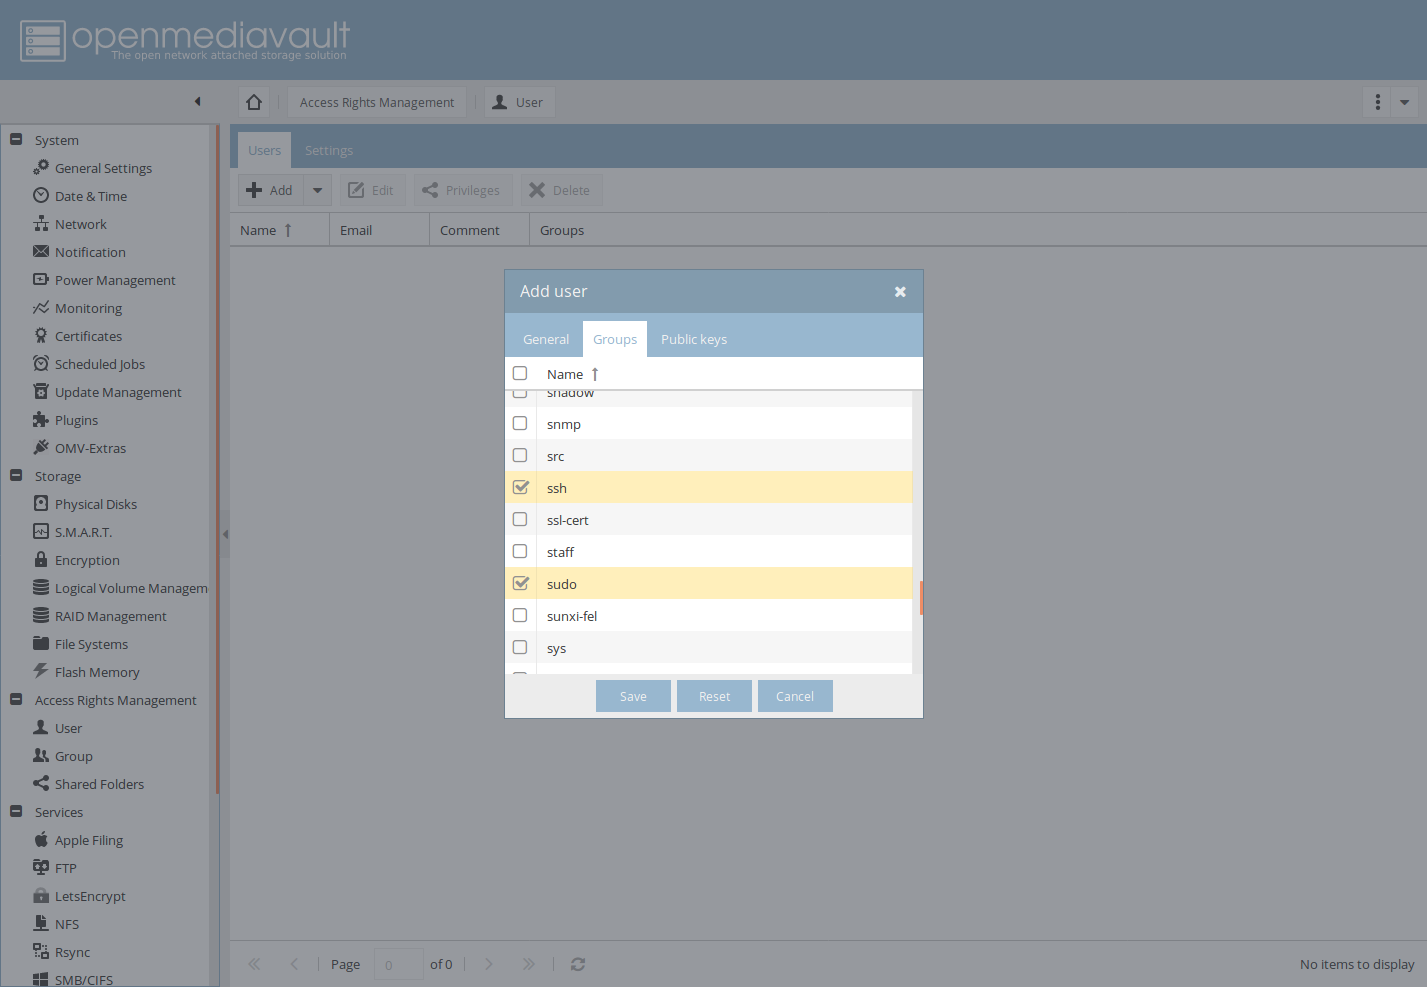
Go to Groups tab.
Activate group ssh and sudo.
Click Save.
Create Shared Folder
Now you need to create Shared Folders that will be exposed through network sharing services. OMV offers many sharing service options, however in this guide we only show how to setup a Windows Share which is the most common option.
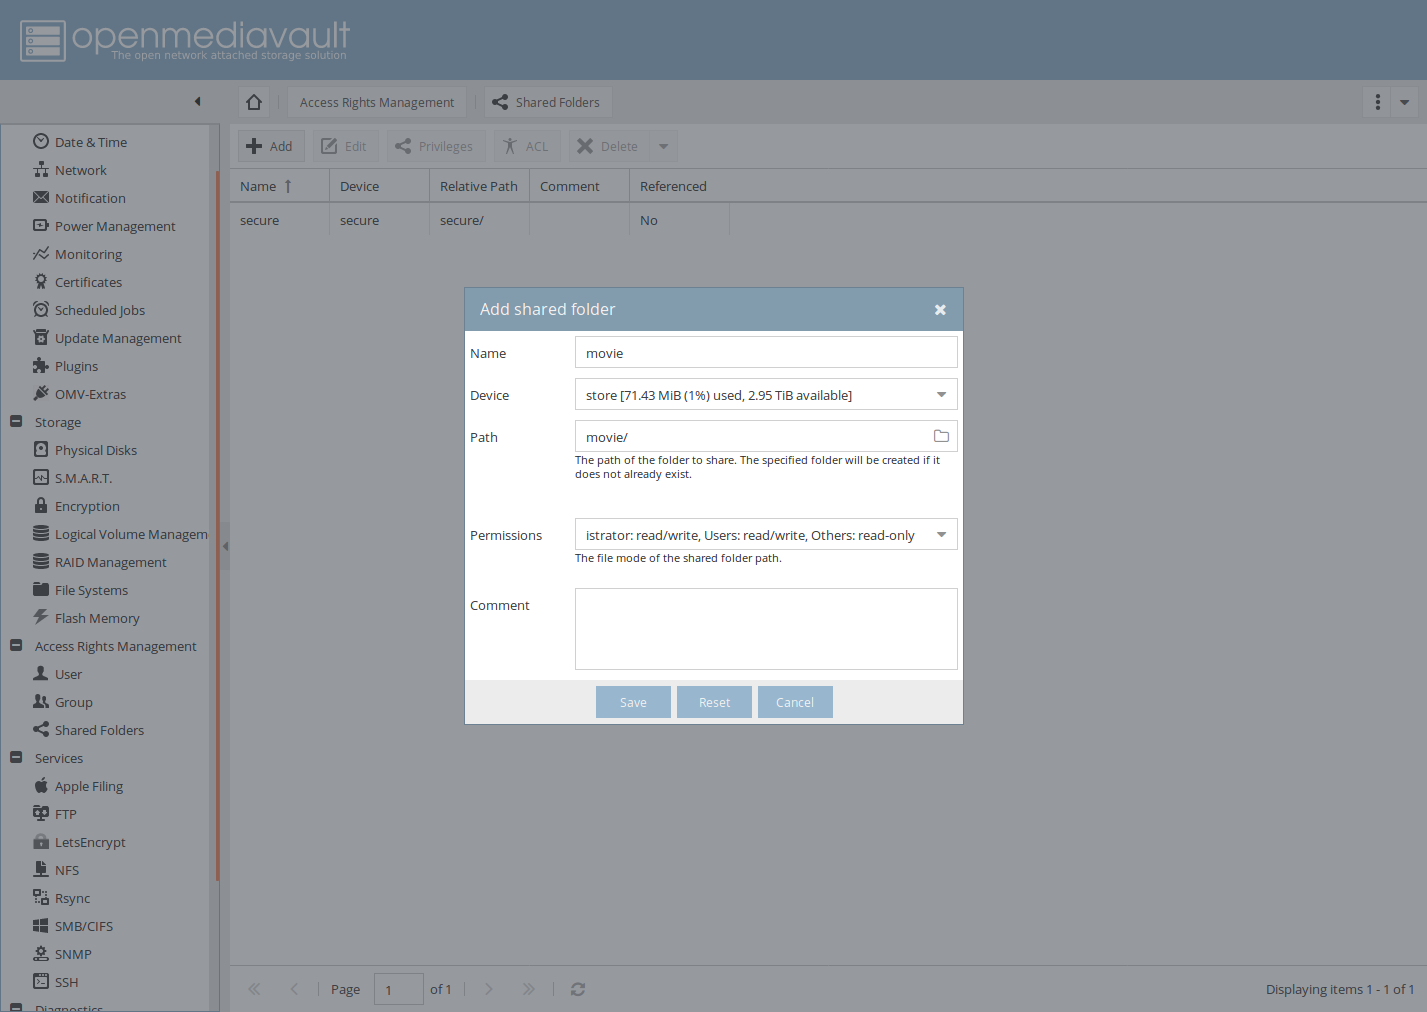
Go to Share Folders page in Access Rights Management section.
Click Add.
Fill Name (e.g movie).
Select Device which is one of the Logical Volumes you created and mounted previously.
Change Path Name if necessary.
Info
You can leave the default permission. But later on you should explore how the permissions settings work and impact your Share Folders.
Repeat the action to add more Share Folders.
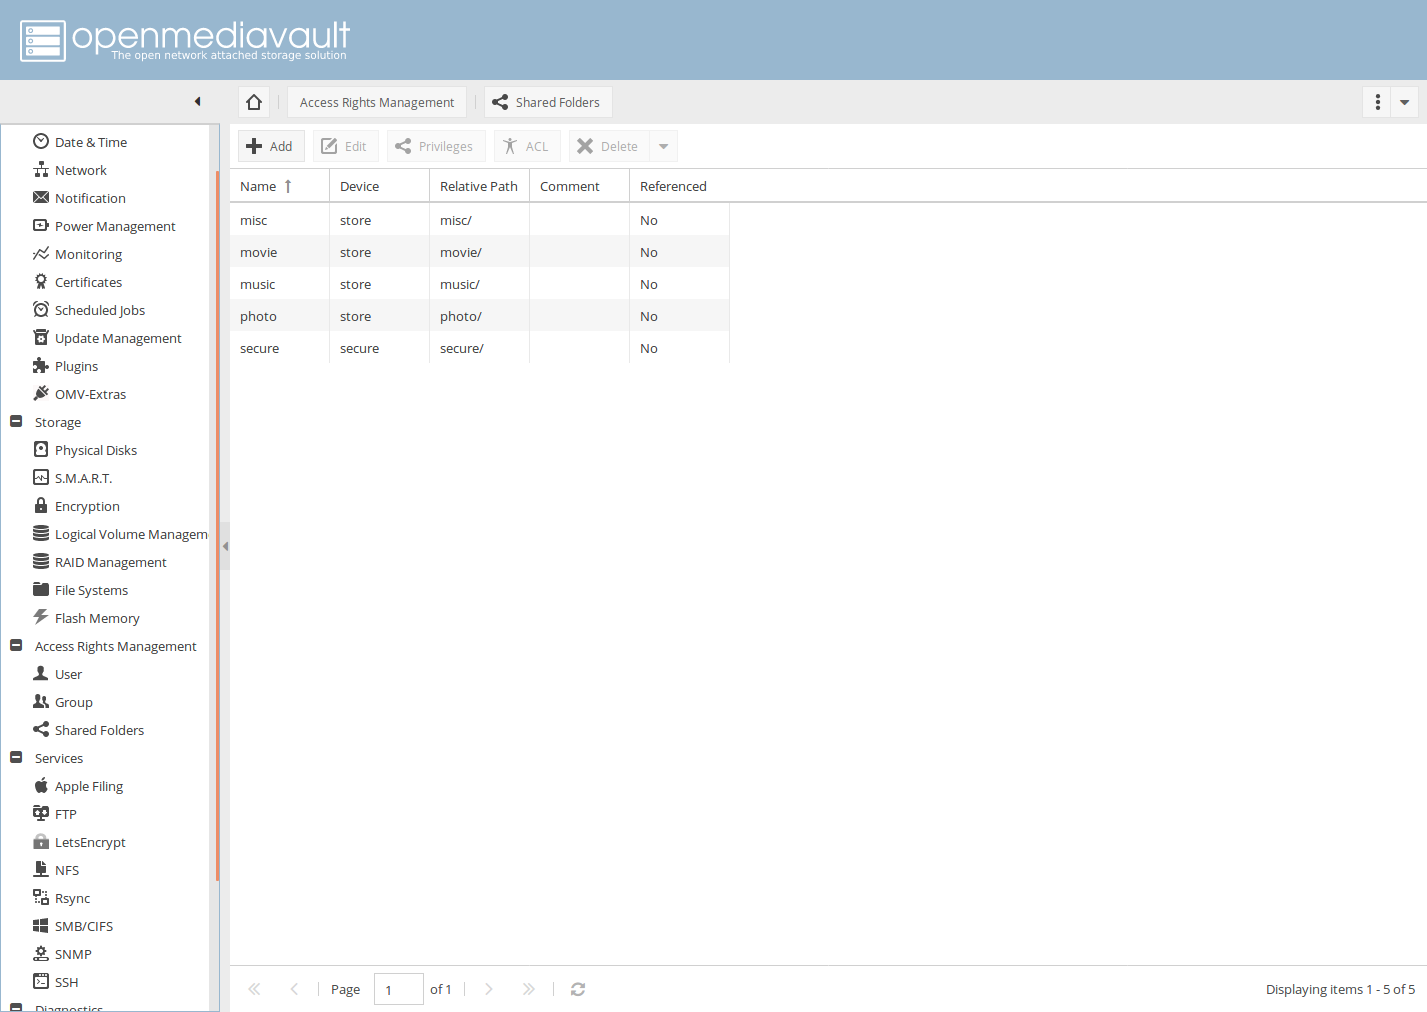
Once done you can see the list of Share Folders you have created and under which Device / Logical Volume they are.
Configure Windows Share (SMB/CIFS)
We will now activate the Windows Share service (a.k.a SMB/CIFS) and enlist the Share Folders you created previously.
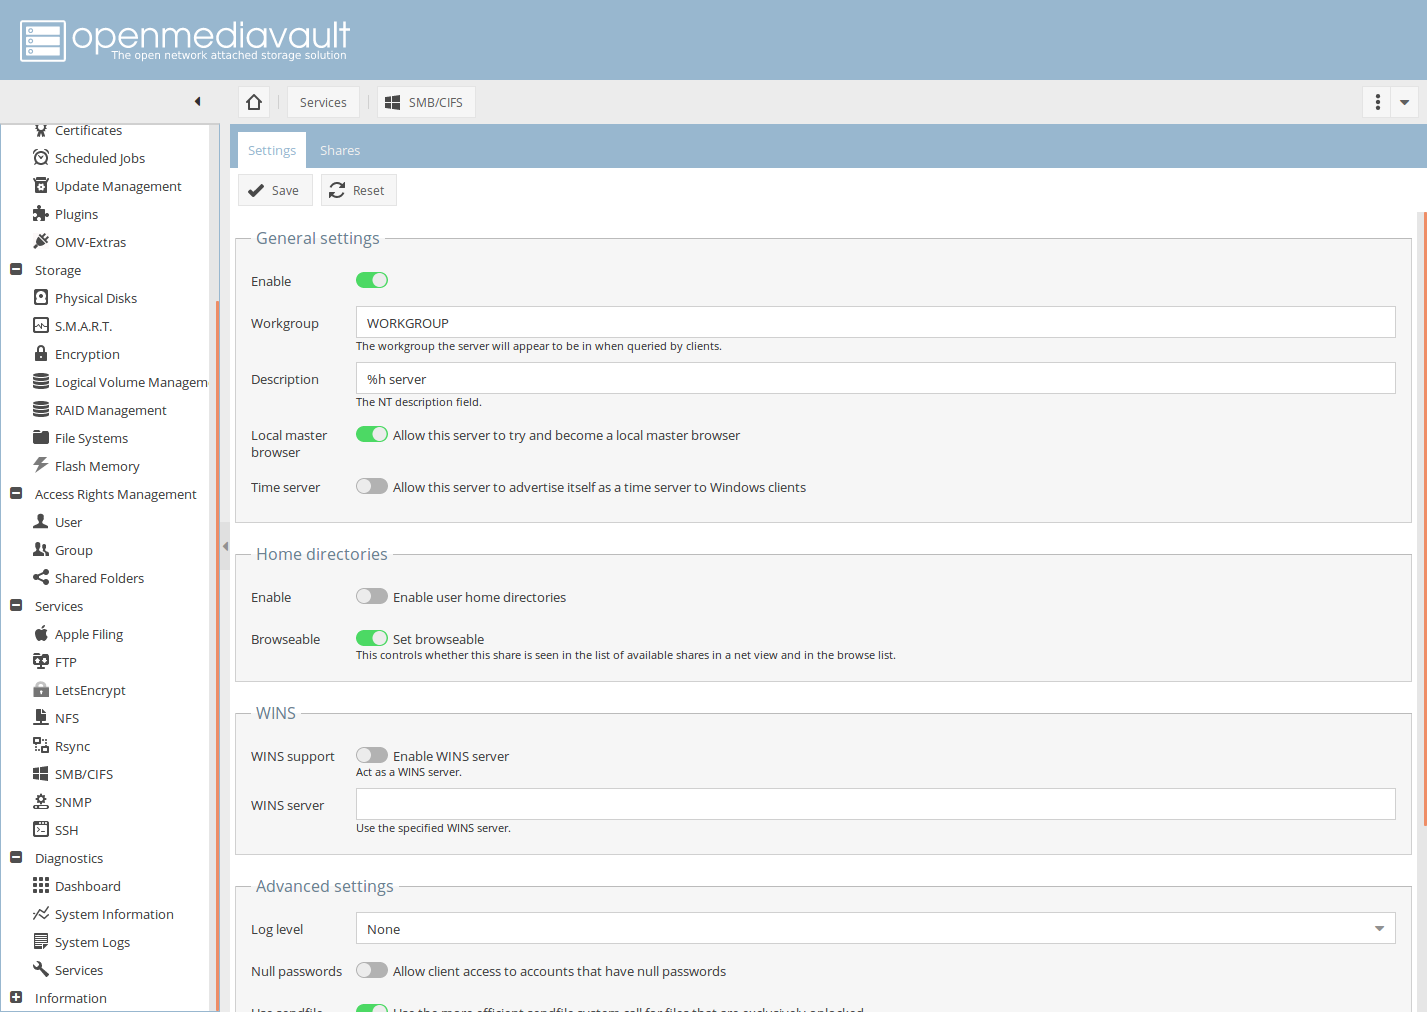
Go to SMB/CIFS page in Services section.
Toggle the Enable button under General Settings.
Go to Shares tab.
Click Add.
Choose a Shared Folder that you created previously.
Choose the Public settings (e.g Guests Allowed).
Click Save

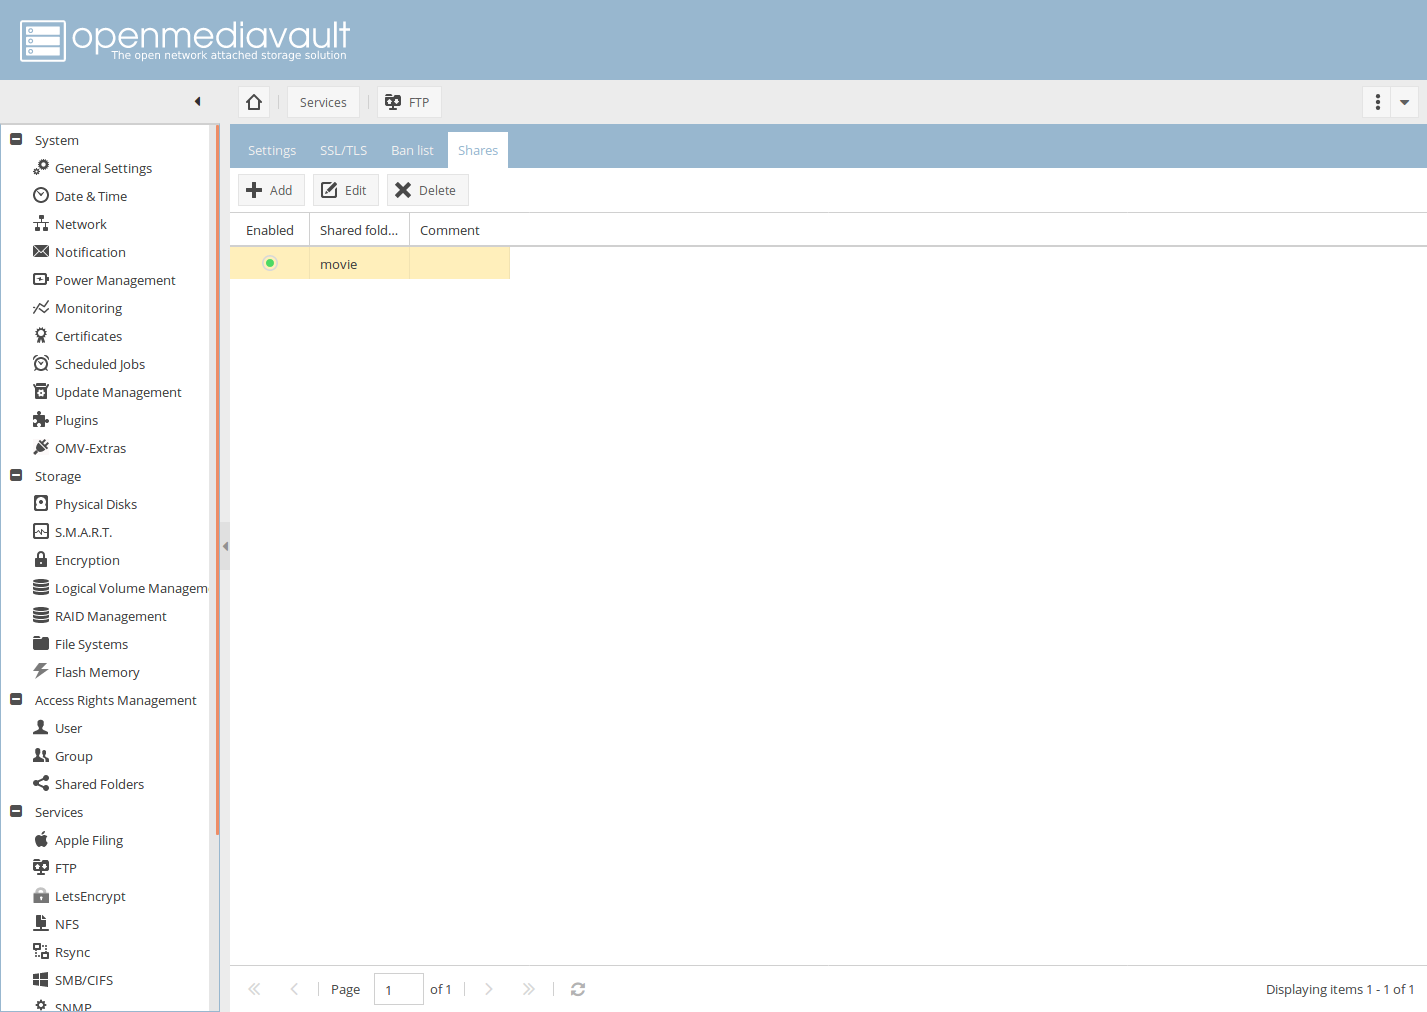
Once done you can see the list of active Shares.
Info
Don't forget to apply your settings by clicking Apply when the following banner appears.
Now you should be able to access your Share Folders from your laptop / computer connected to your Home network.
Accessing Shared Folder (Linux / Ubuntu)
Using File Manager
Some Linux flavors, like Ubuntu, provide File Manager that supports natively Windows Share Folder discovery and access.
Open File Manager
Go to Network
Click helios4 - SMB/CIFS
Info
If your File Manager doesn't find helios4, it can be due that your laptop / computer is not on the same subnet that Helios4. Check your network configuration.

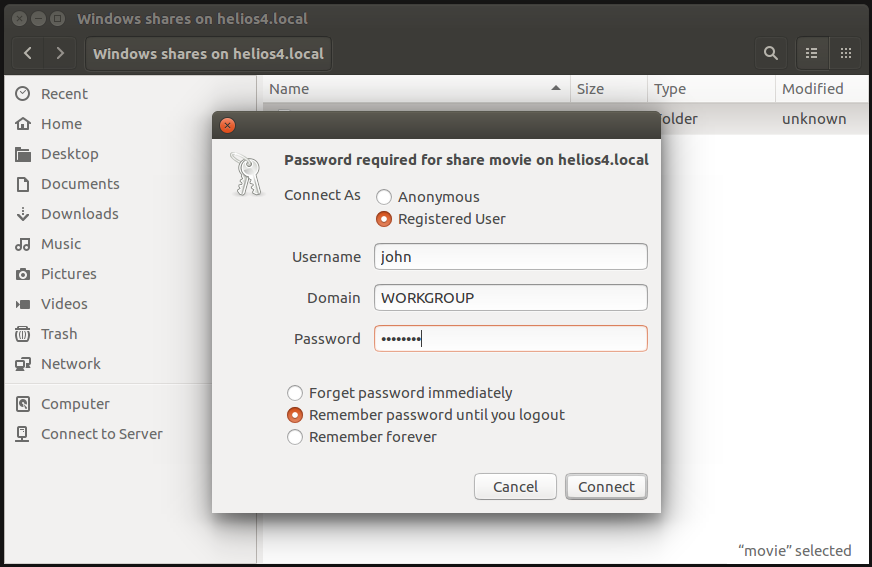
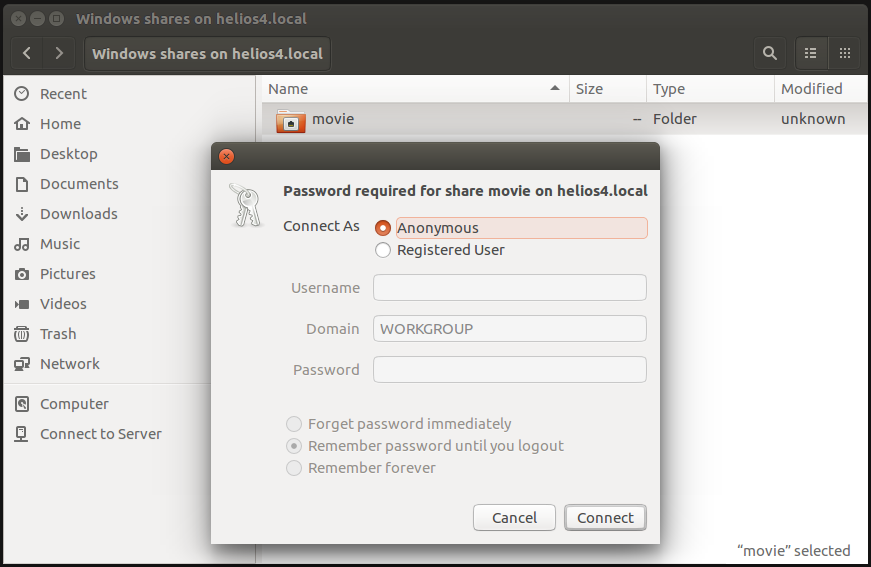
Click on one of the Share Folders (e.g movie).
Select Registered User.
Enter Username and Password of the user you created previously (e.g john).
click Connect.
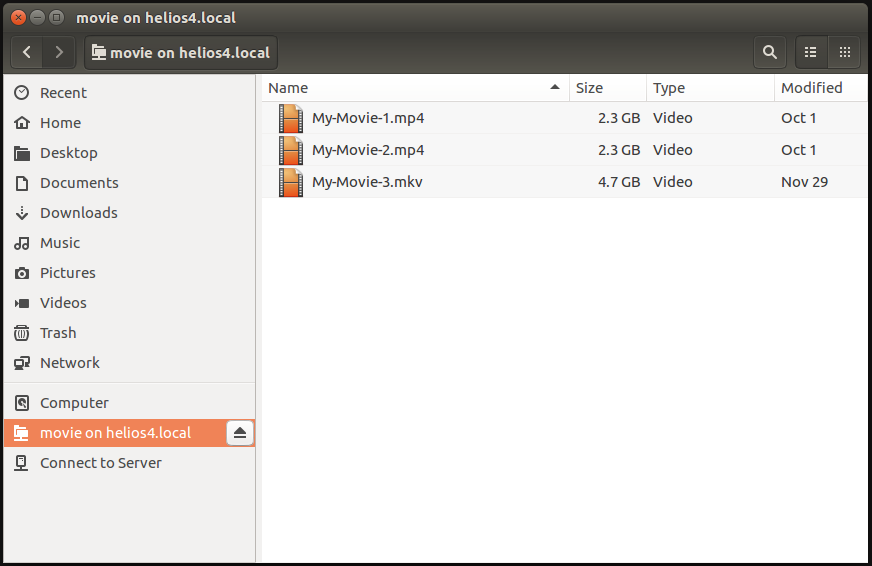
Now you should be connected to the Share Folder. Check in the side pane, you should see something like 'movie on helios4.local' with an Eject icon.
You can start copying over from your laptop / computer files in the Share Folder.
You can also try to access as anonymous user which should allow you access the files but not to add / delete files.
Click the Eject icon of the Share Folder.
Repeat above steps but this time connect as Anonymous.
You can repeat the above steps to connect to your other Share Folders.
Using Terminal
mount -t cifs //10.10.10.1/movie /mnt -o username=anonymous
Accessing Shared Folder (Windows)
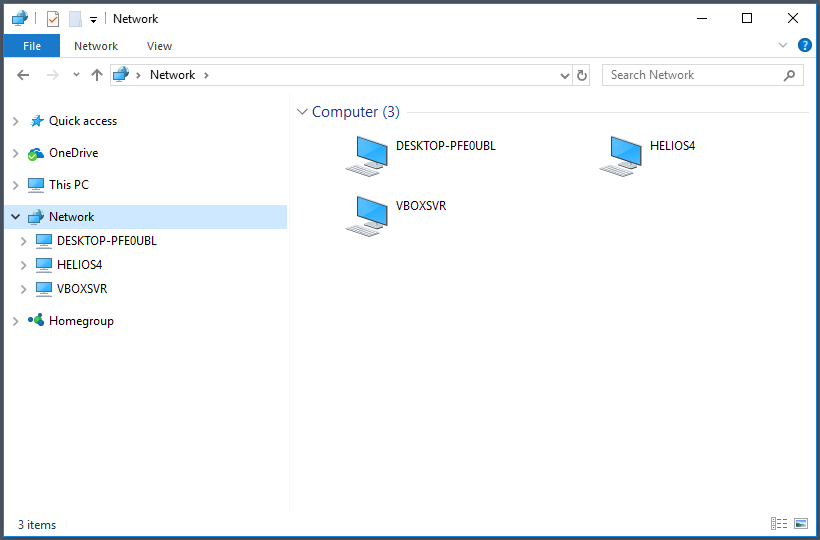
Open File Explorer.
Go to Network.
Info
If your File Manager doesn't find helios4, it can be due that your laptop / computer is not on the same subnet that Helios4. Check your network configuration.
Go to Helios4.
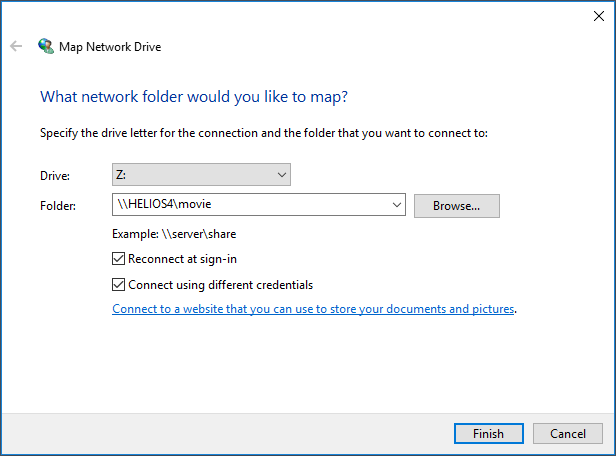
Right-Click on a Share Folder and click Map network drive....
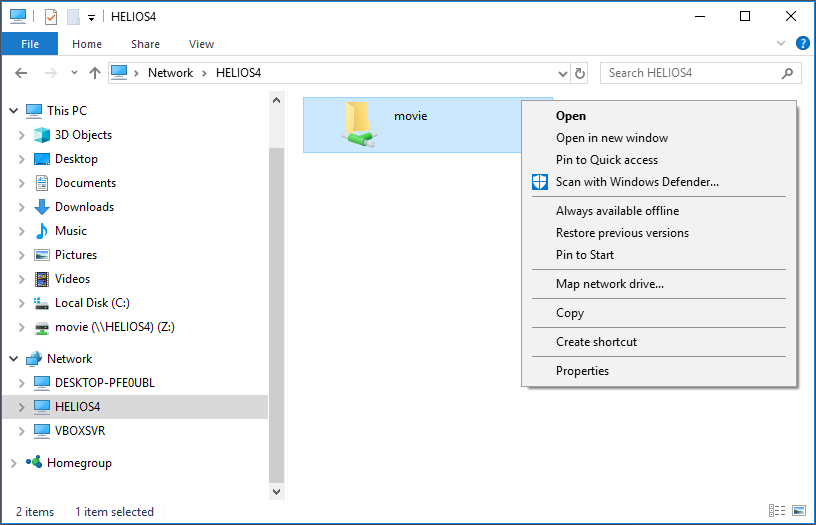
Check Connect using different credentials.
Click Finish.
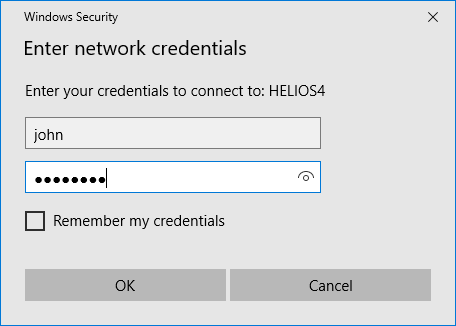
Enter Username and Password of the user you created previously (e.g john).
click OK.
Now you should be connected to the Share Folder. Check in the side pane, you should see something like 'movie (\\HELIOS4)'.
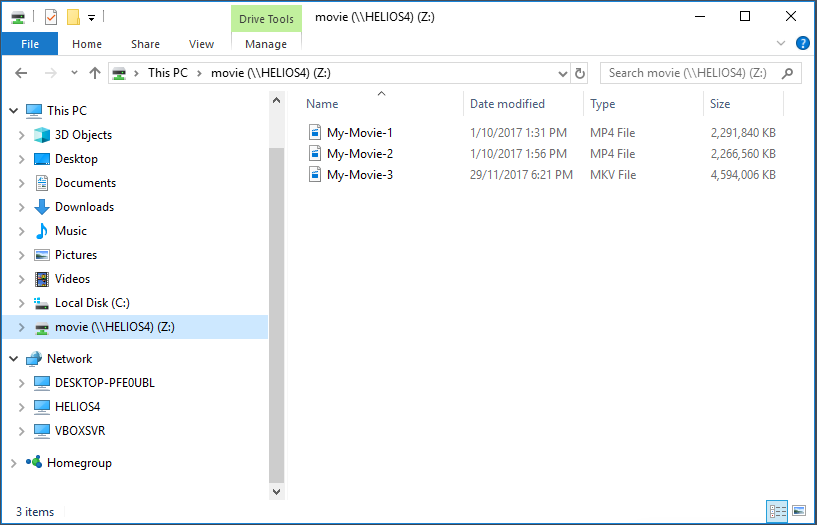
You can repeat the above steps to connect to your other Share Folders.