First Start
Step 1 - Connect to Helios64 serial console
Under Windows
Important
For Windows version prior to Windows 10, you will need to install the FTDI driver in order to access the USB to serial bridge used by Helios64. You can find the driver here.
-
Download PuTTY and install it on your computer.
-
Make sure your serial communication device is already detected by system.
-
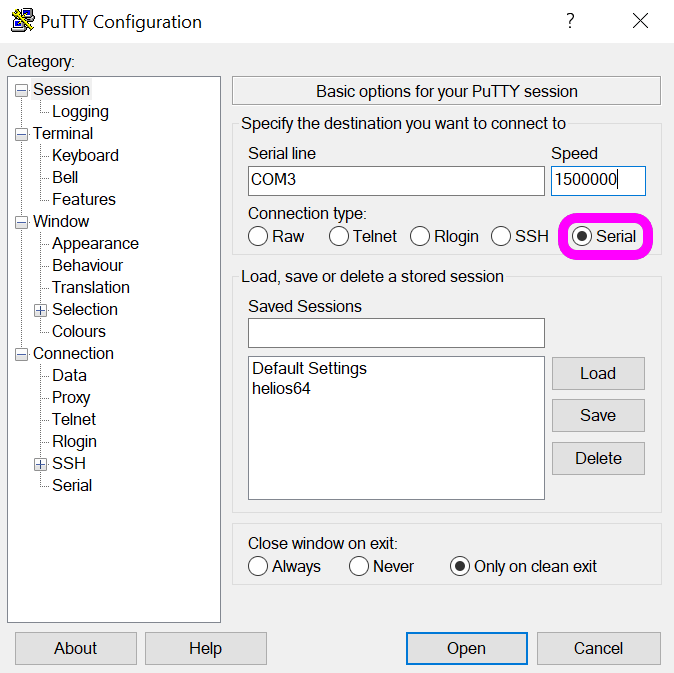
Select connection type serial.
-
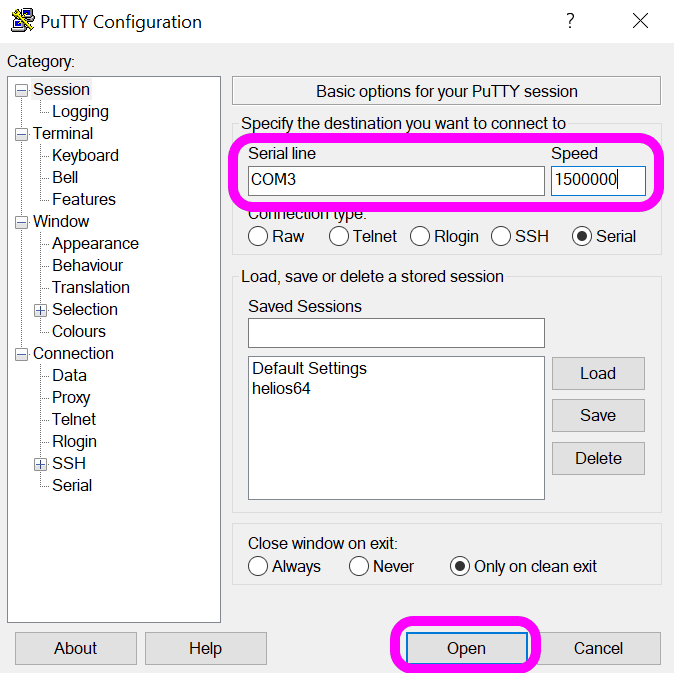
Setup serial port settings (Serial line : COM3 and Speed : 1500000), then press 'Open'
Note
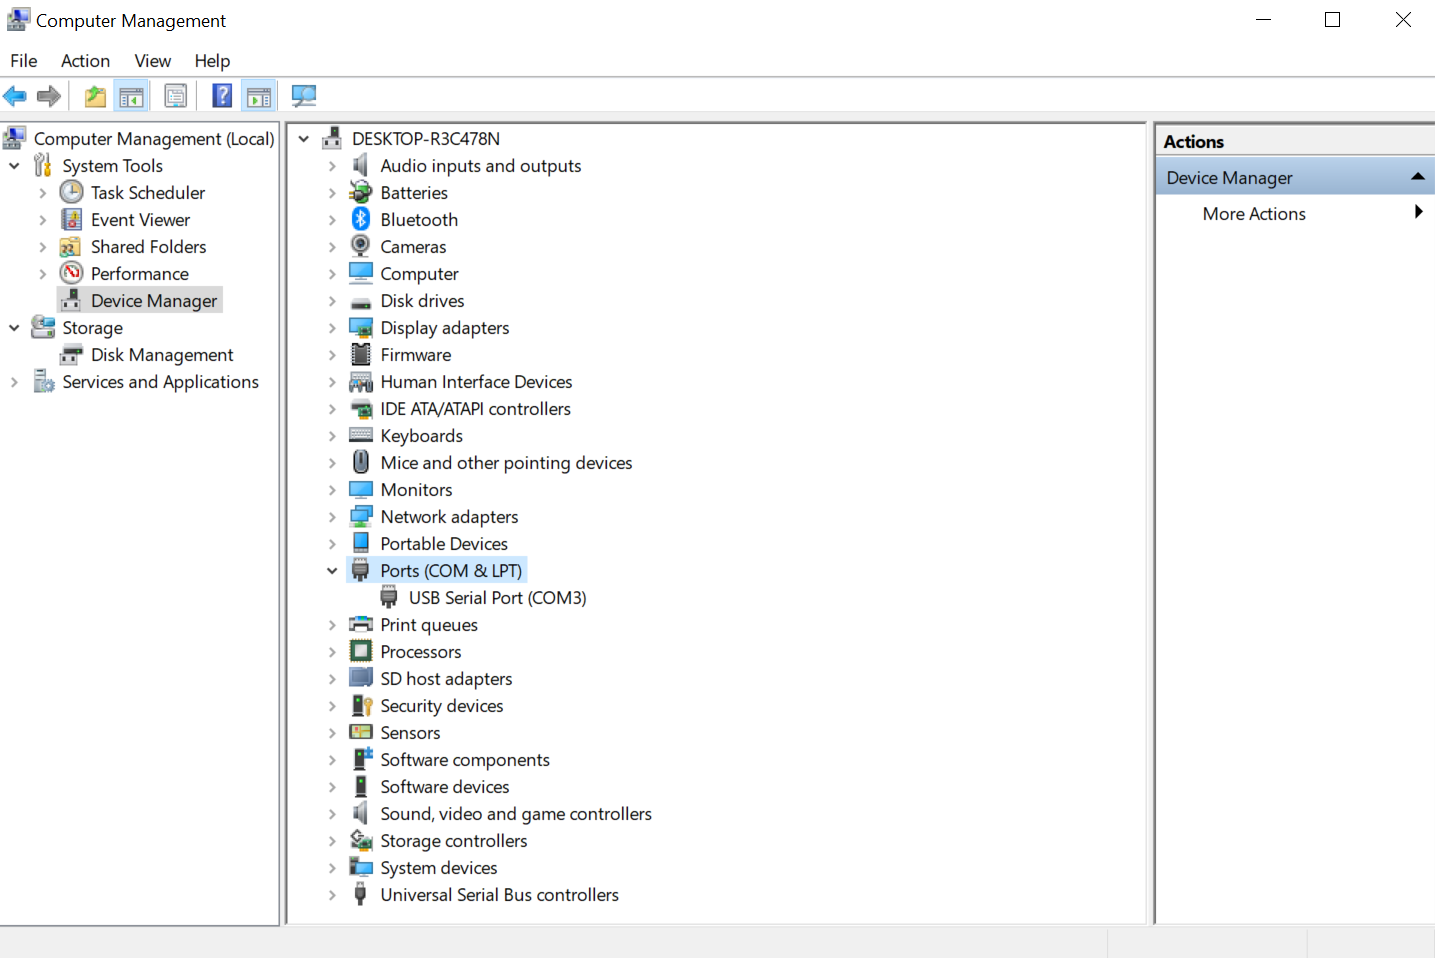
The serial port detection may vary on different system, please make sure to check the device manager to get the information of correct serial port to connect to Helios64. Check this link to learn how to determine the right COM port.
Under Linux (via Terminal)
1. Install picocom
Use apt-get under Debian/Ubuntu
$ sudo apt-get install picocom
Use yum under RHEL / CentOS / Fedora Linux
$ sudo yum install picocom
2. Connect to serial with picocom
$ sudo picocom -b 1500000 /dev/ttyUSB0
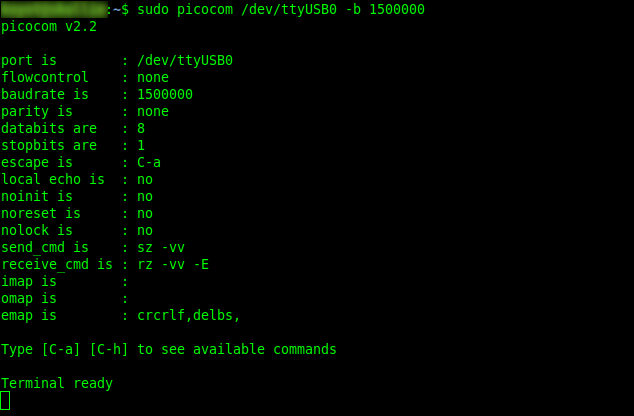
To exit picocom do Ctrl-a then q button in squence
Note
Using command _ls -la /dev/ttyUSB_ you should be able the find the USB to serial bridge device used by Helios64. Under Linux the device will be named /dev/ttyUSBx, where x* is a digit.
Under Mac OS (via Terminal)
Important
For Mac OS you might need to install the FTDI driver in order to access the USB to serial bridge used by Helios64. You can find the driver here.
Connect serial using the screen command
$ screen /dev/tty.usbserial-XXXXXXXX 1500000 -L
To exit the session do Ctrl-a then Ctrl-k
Note
Using command _ls -la /dev/tty.usb_ you should be able the find the USB to serial bridge device used by Helios64. Under Mac OS the device will be named /dev/tty.usbserial-xxxxxxxx, where xxxxxxxx* is some serial number.
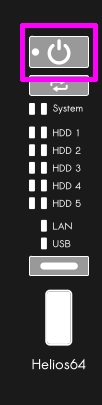
Step 2 - Power-Up Helios64
Now that everything is ready you can plug-in the AC adapter and push the Power Button.
If you are using Helios64 without an enclosure:

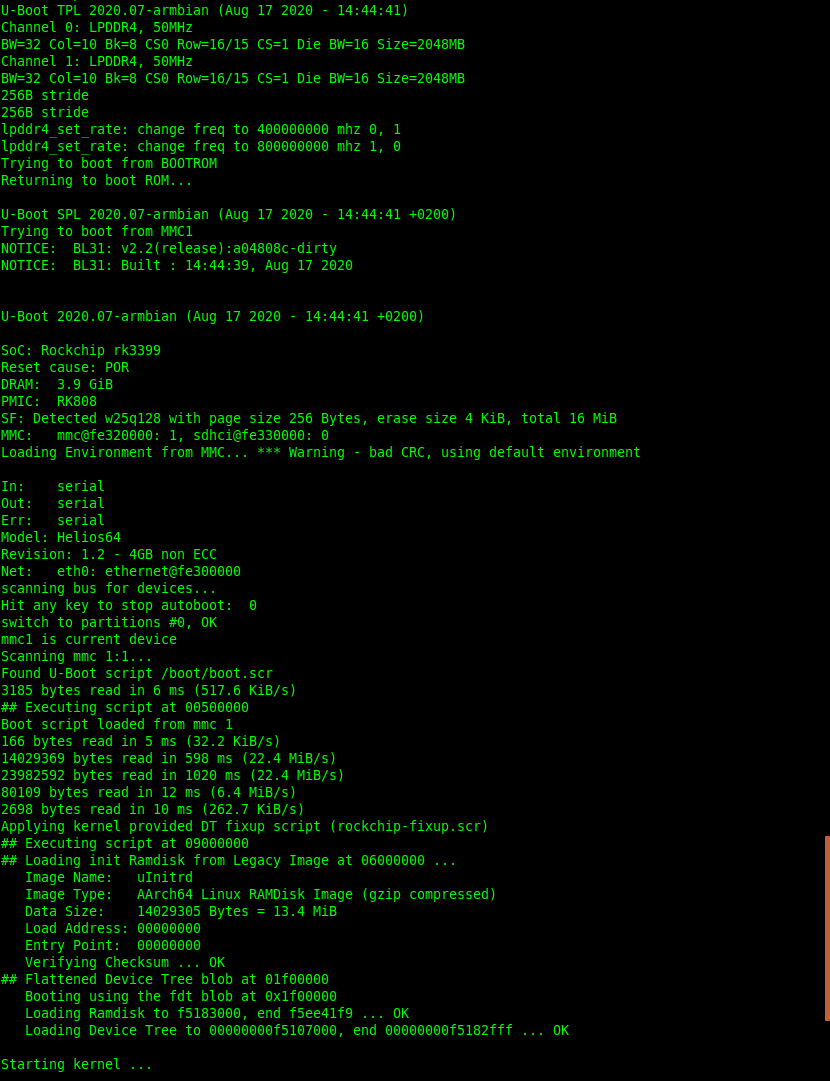
You should see Helios64 boot logs on the Serial Console.
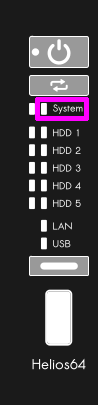
If you missed the boot logs, another way to check if your system has fully booted is to look at the System LED which acts as system heartbeat. If Operating System has booted properly and is alive, the System LED should be blinking.
Step 3 - Log in
Note
You might need to press Enter for the login prompt to come up.
If system didn't auto logged-in. Default credential for Debian or Ubuntu image
helios64 login: root
Password: 1234
You will be prompted to change the root password and then create a new user account.
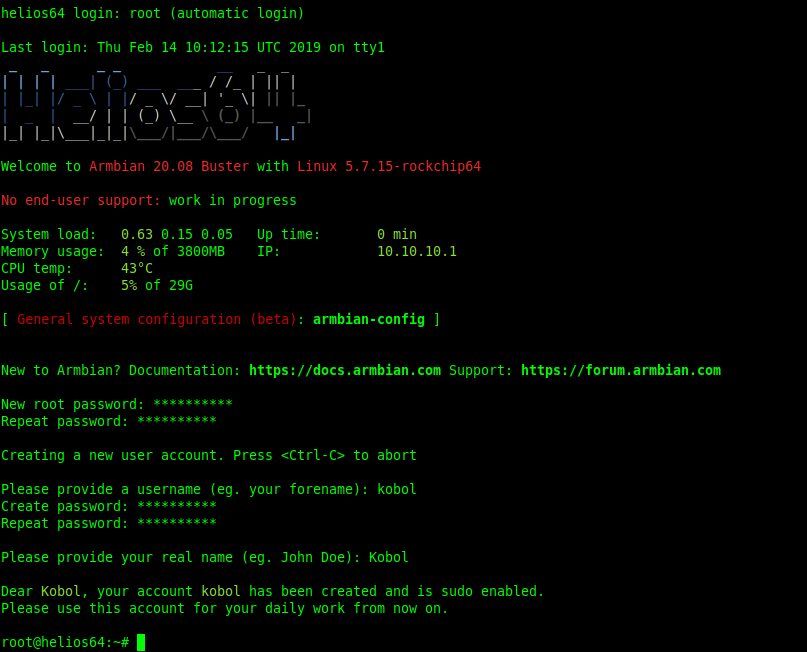
Step 4 - Check/Set IP address
Check IP address
By default Helios64 will try to obtain an IP address via DHCP. To figure out what is the allocated IP address you will need to type the following command in the console.
ip addr show dev eth0

Here the IP address of Helios64 is 10.10.10.1.
Set IP address
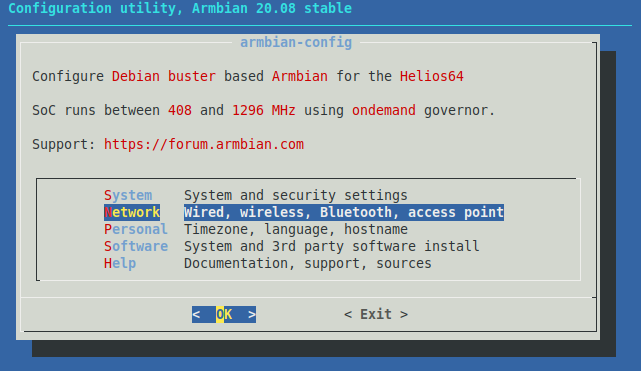
If you wish to manually configure your IP address you can use the armbian-config tool.
armbian-config
Select the Network section:
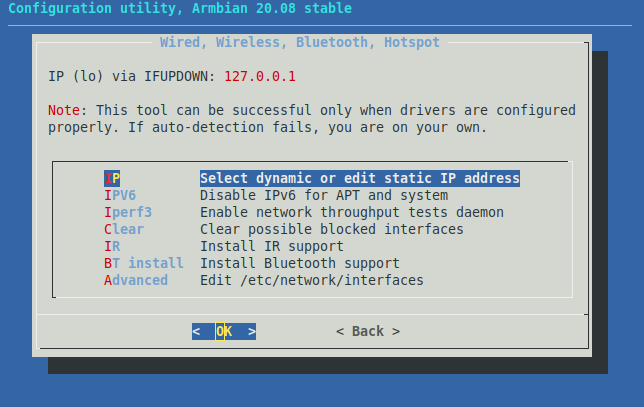
Navigate to IP to configure your IPv4 address:
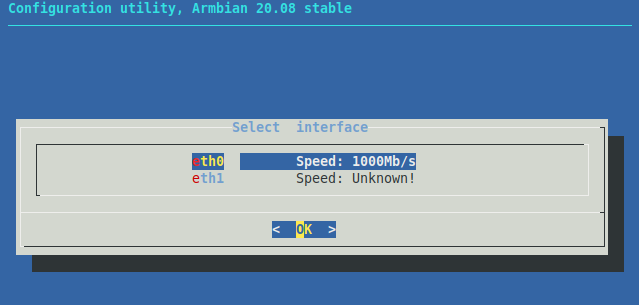
Select the Ethernet interface you want to assign a fixed IPv4 address. In this case we select eth0 which correspond to LAN port 1:
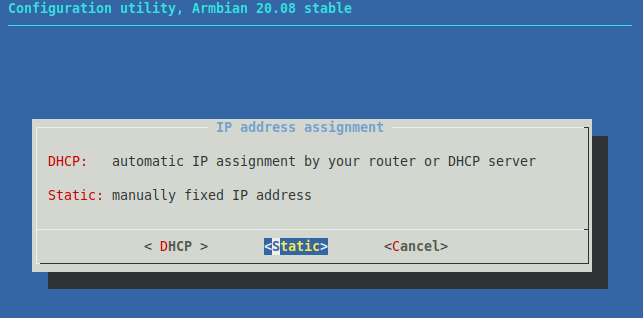
Select Static:
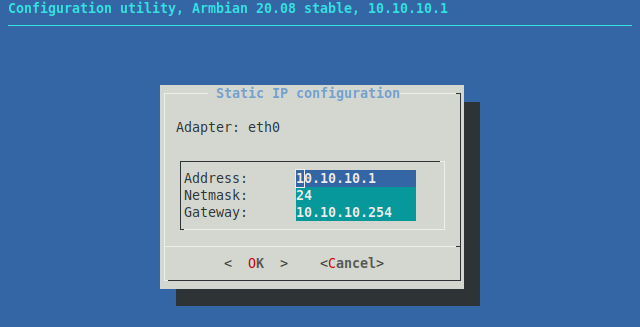
Provide the IP Address, Netmask, and Gateway information that you want to assign:
Press ESC till you exit armbian-config tool.
You will have to reboot for the network settings to take effect.
sudo reboot
Info
You can also refer to the following Debian Wiki Page for advanced network settings.
Step 5 - Connect to Helios64 via SSH
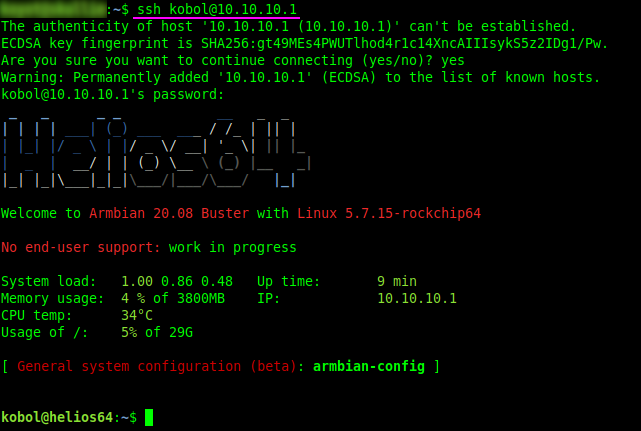
You can now connect by SSH to your Helios64 to carry on with your configuration.
Here is the example when we use linux client:
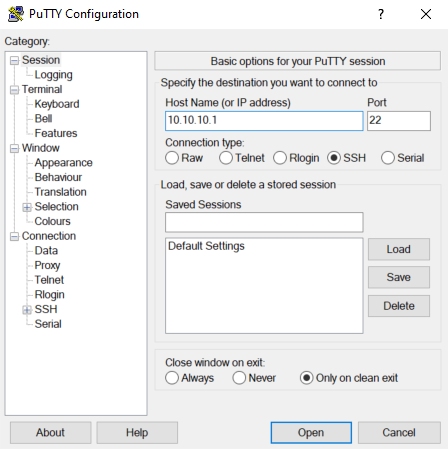
You can use putty as the SSH client if you are using windows:
What to do next ?
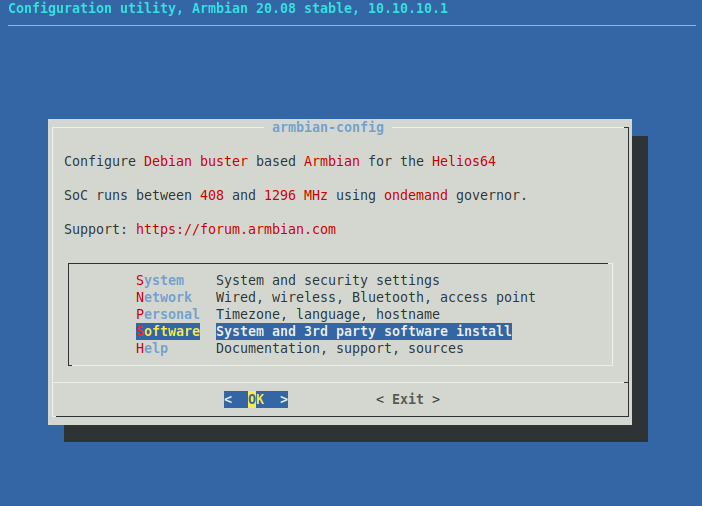
You can use armbian-config which provides an easy way to install 3rd party applications like OpenMediaVault, NextCloud, Syncthing, Emby and many more.
Here an example on how to install software OpenMediaVault (OMV) using the armbian-config.
sudo armbian-config
Select Software section:
Navigate to Softy:
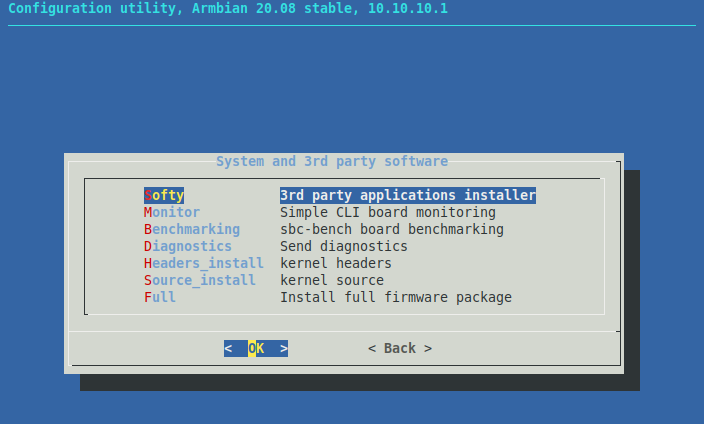
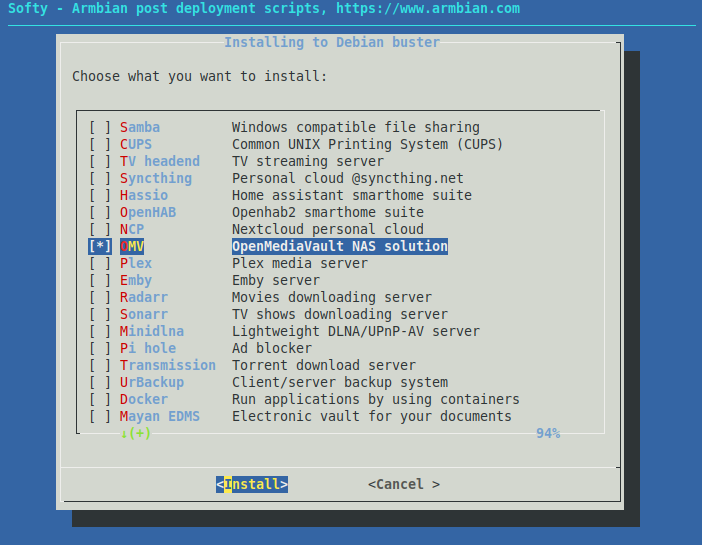
Then choose OMV, to install the OpenMediaVault:
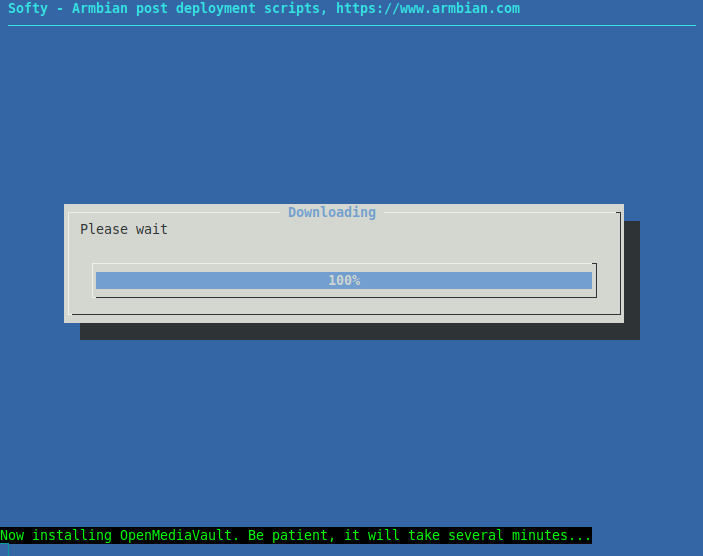
Wait the install process to complete:
Now you should be able to connect to OpenMediaVault (OMV) Control Panel.
Open your web browser and go to the one of the following addresses :
- http://helios64.local
- http://xxx.xxx.xxx.xxx (How to check Helios64 IP address)
Default credential :
- Username: admin
- Password: openmediavault
Support Forum
If you are facing some issues, you can go on Armbian forum to ask for some help.